Channels
Send messages to end users through communication channels such as WhatsApp or Viber. Example: Send appointment reminders, share order information, or promote new products.
Each channel has specific features. Refer to the documentation for the channels to identify the correct channel for your use case and target country.
In Flow, each channel has a separate channel element. Example: The SMS channel has the Send SMS message element. Use these elements to configure the message that you want to send to the end user.
You can use multiple channels in the same flow.
Use a channel element in your flow
Use channel elements with other flow elements to create your communication campaign.
Prerequisites
Enable the channel in your Infobip account. For information about enabling a channel, refer to the documentation for that channel.
For a list of channels supported in Moments, refer to Supported channels.
Add the channel element to the flow
-
Add the channel element to the relevant section in your flow.
-
Select the element to open the side panel.
-
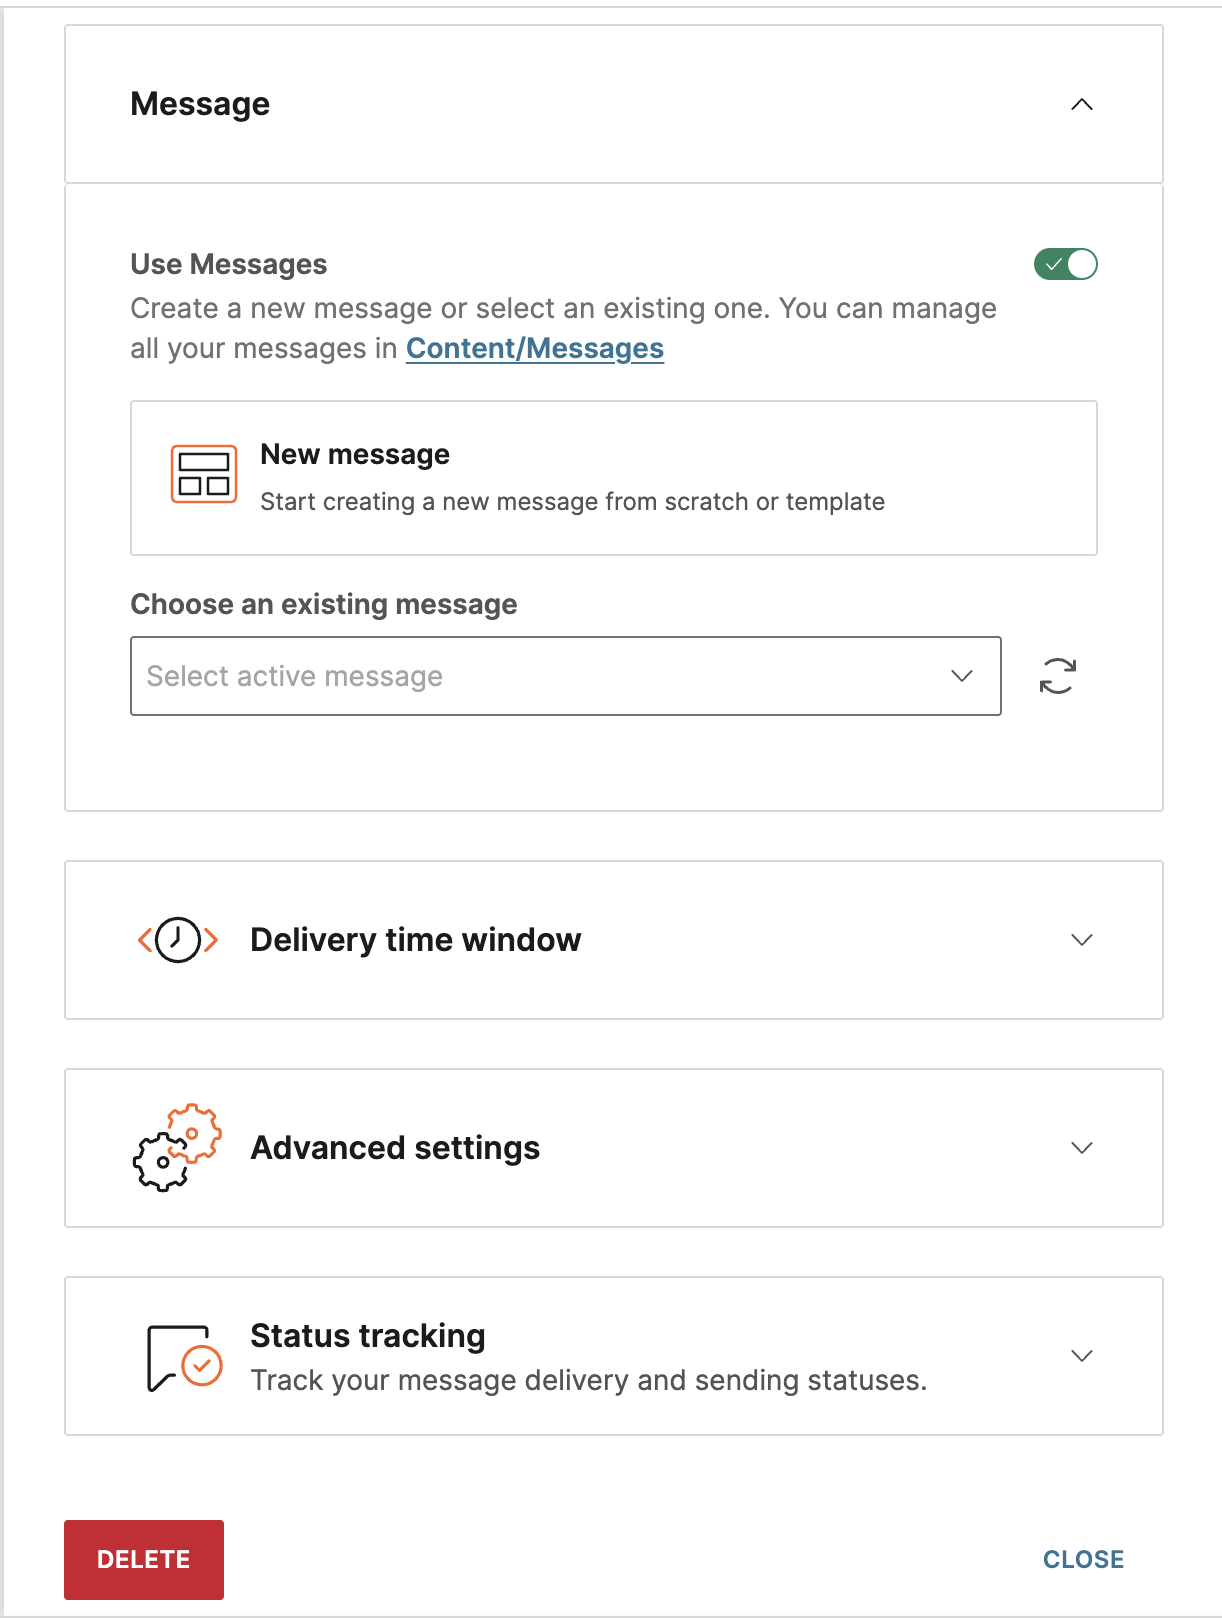
Configure the message content. Either select an existing message or create a new message.
-
(Optional) Configure the channel options. Each channel might support a different set of fields.
- Tracking and reporting options: If your message contains links (URLs), you can do the following:
- Shorten URLs: Shorten the length of the URLs.
- Track URL clicks: Identify the number of times end users clicked the URL, which end user clicked the URL, and the campaign from which the clicks originated.
- Delivery time window: Set the time and time zone for your communication.
- Message sending speed: Enter the number of messages that you want to send within a specified period.
- Send-time optimization: Enable the flow to determine the best time to send messages to end users.
- Validity period: Set the maximum period during which the flow tries to deliver the message to the end user.
- Data payload: Select one or more data that you want to add from stored or imported contacts to your messages. Example: first name and country.
- Status tracking: Make sure that the end user goes to the next step in the flow only if the message has either been sent or delivered successfully.
Next steps
-
(Optional) Use the following settings with the channel element:
-
Use the Evaluate Inbound Message element to evaluate the end user's message and branch the flow accordingly.
This feature is available only for channels supported by the Evaluate Inbound Message element.
-
If you want to notify your internal business units as part of the flow, use the Notify internal recipients function. Example: You want to notify a store manager or staff member when an end user responds.
-
-
Configure the rest of the flow to meet your use case.
-
After launching the flow, you can view traffic reports for the channel. Go to Analyze and view the channel statistics. You can also generate a report that contains detailed information.
Create the message
Message creation methods
Depending on the channel, you can create messages in the following ways.
- In Messages: Create a message in Content > Messages and then select it in the channel element. For more information, refer to the Messages documentation.
- In the channel element.
For channels in which there is a limit on the message size, make sure that the message is within the limit.
Differences between the message creation methods
Use the following table to decide which message creation method you want to use.
| In Messages | In the channel element |
|---|---|
| Create the message in Content > Messages. | Create the message in the channel element. |
| The message is stored in Content > Messages. | The message is stored in the flow. |
| You can edit the message content at any time, even after the flow is launched. | To edit the message content, you must create a new version of the flow. |
| You can reuse the message in other flows. | The message is specific to the flow. |
Supported message creation methods for a channel
| Channel | Create from Messages | Create from the channel element |
|---|---|---|
| Apple Messages for Business | ✓ | ✓ (Deprecated) |
| ✓ | ✓ (Deprecated) | |
| In-app message | ✗ | ✓ |
| LINE | ✓ | ✓ (Deprecated) |
| Messenger | ✗ | ✓ |
| MMS | ✗ | ✓ |
| Mobile push | ✓ | ✓ (Deprecated) |
| RCS | ✓ | ✓ (Deprecated) |
| SMS | ✗ | ✓ |
| Viber business messages | ✓ | ✓ (Deprecated) |
| Voice and Video | ✗ | ✗ |
| ✓ | ✓ (Deprecated) |
Create a message in the channel element
In the side panel of the channel element, do the following.
-
Disable the Use messages field.
-
Select a sender in the Sender or From field.
-
In the Content section, select to create content.
-
In the design editor, add one or more of the message types supported by the channel.
Example: Depending on the channel, you can create rich messages containing text, buttons, images, or videos.
-
Create the message.
-
Configure the fields for the selected message type. The fields might be different for each message type.
-
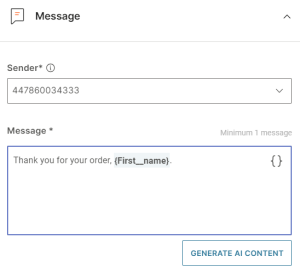
(Optional) Personalize the message.
Personalize the message
Some message types support personalization. You can do the following.
Add variables
Use flow variables as placeholders to personalize the message.
For channels in which there is a limit on the message size, make sure that the message is within the limit after the values of variables are filled in.
Add emojis and formatting
Use the following markup.
| Formatting | Symbol | Example | Preview |
|---|---|---|---|
| Bold | Asterisk (*) | Your total is *$10.50*. | Your total is $10.50. |
| Italics | Underscore (_) | Welcome to _WhatsApp_! | Welcome to WhatsApp! |
| Strikethrough | Tilde (~) | This is ~better~ best! | This is |
| Code | Three backticks (```) | ```print Hello World``` | print Hello World |
Channel elements
This section shows how to configure the channel-specific options in each channel element and the supported message types in the element.
For information about configuring advanced options, refer to the Channel options section.
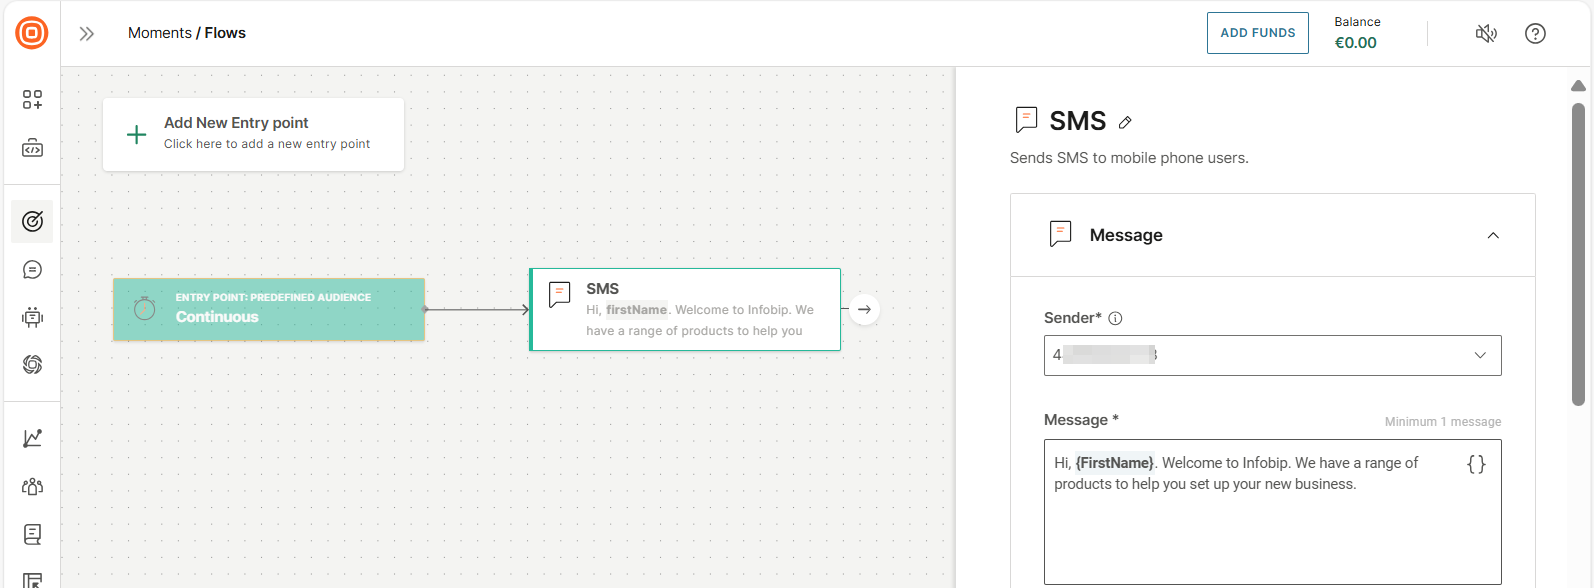
SMS
To communicate with end users through the SMS channel, add the Send SMS message element to the flow editor.
Configure the element
Select the element to open the side panel and configure the following fields.
Message
Sender: Select the sender.
Message: Add the message content.
You can add a maximum of 160 characters, including spaces, special characters, new line, emojis, and placeholders.
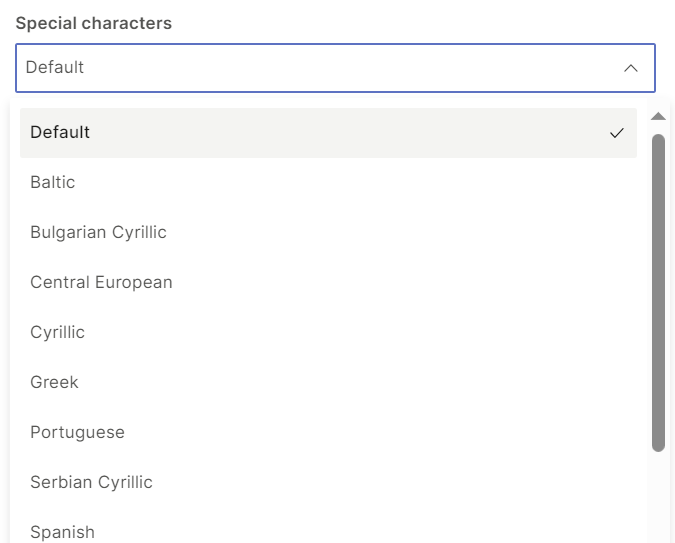
Special characters (optional): If you need to use characters that are not part of the GSM alphabet, define special characters.
Distributed Ledger Technology (DLT): Enable DLT if you want to track and verify the delivery of SMS messages, and to make sure that they are sent and received by the intended recipients. For more information, refer to the DLT documentation.
The DLT feature is applicable only to India.
Enable delivery reports over API pull: Select this option to identify the number of delivered messages.
Flash SMS: Display the message directly on the screen of the recipient’s device. The recipient does not need to open the message to read it.
Ignore the Do not contact list: The flow sends a message to the end user even if the contact is in the Do not contact list. Use this option when you want to send transactional messages to end users but do not want to send them promotional messages.
In-app message
Use In-app message to send communications to mobile app users when they use the app. In-app messages are displayed on the mobile app screen when the end user opens the app or at the moment that you define in the flow.
(Optional) Use the Demo app to test in-app messages.
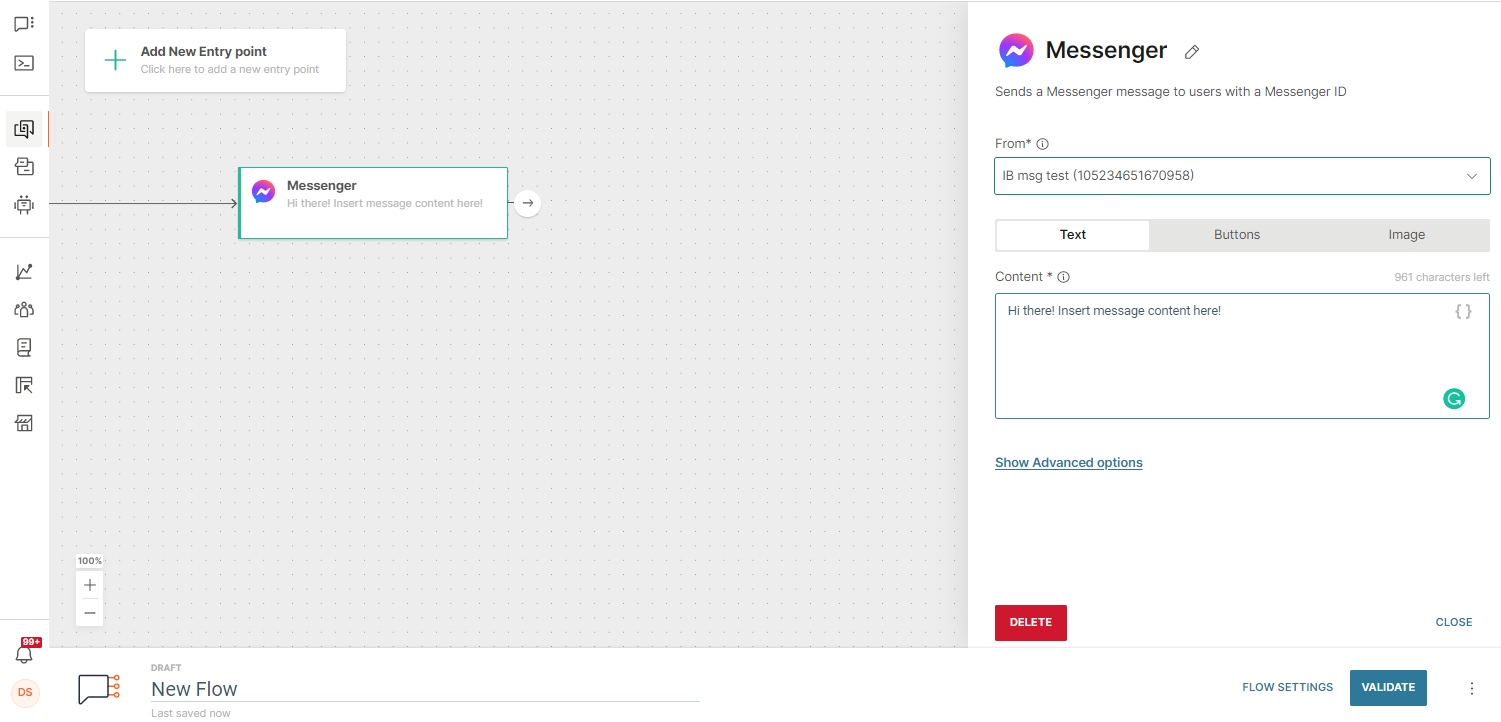
Messenger
Send customized Messenger messages to end users as part of a flow. Use inside the Flow to converse with the customers regardless of their location, and provide support or a response to their inquiries.
Supported message types
The channel supports the following message types:
- Text
- Buttons
- Image
Configure the fields in the element
In addition to the options listed in the channel options section, you can configure the following field.
Enable delivery reports over API pull: Select this option to identify the number of delivered messages.
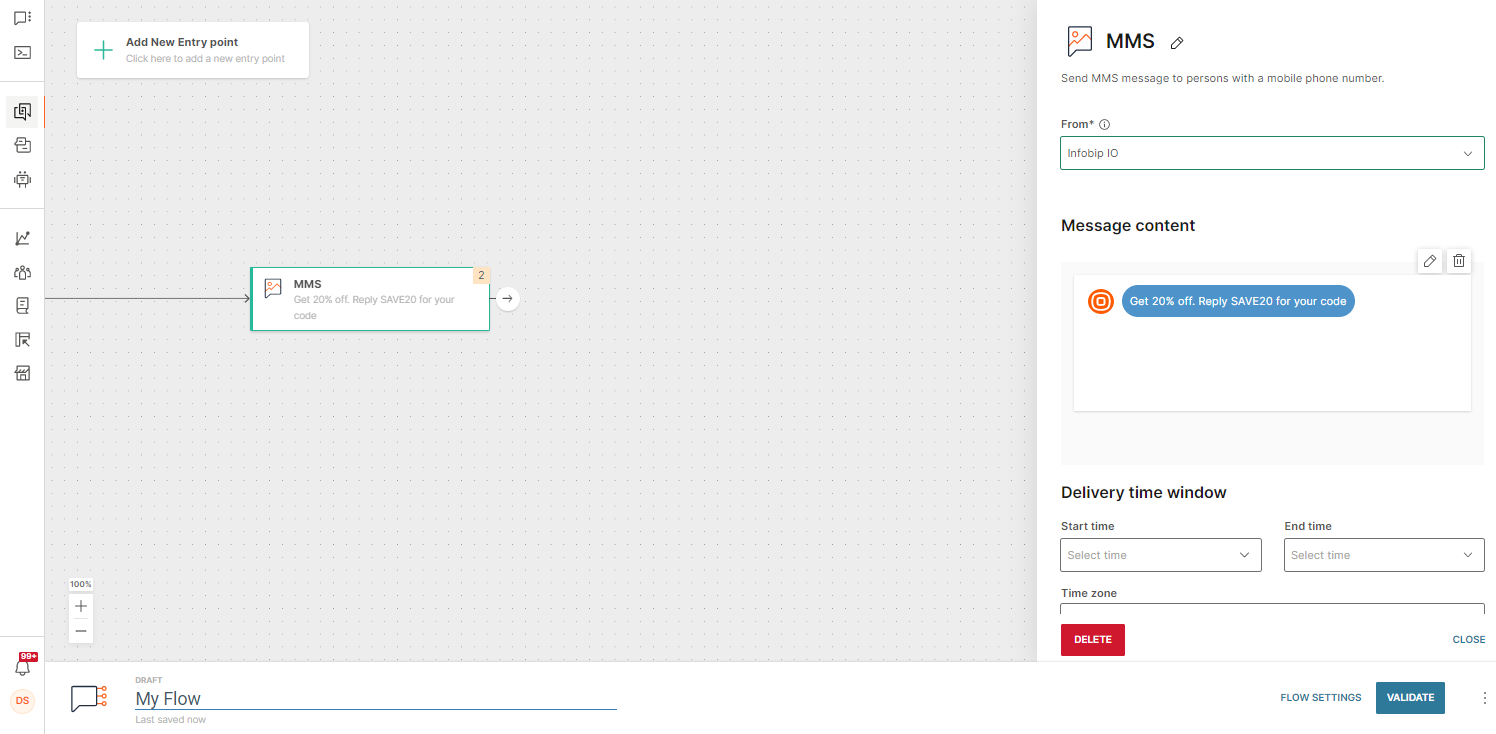
MMS
Create engaging multimedia messages with MMS and add them to your flow.
Supported message types
The channel supports the following message types.
- Audio
- Video
- Image
- Text
- Application
- vCard
Create the message
Add the sender information and then provide your rich media content in the side panel. Use multiple media formats including audio, video, image, text, application, and vCard files in your message, just ensure that the message file size is within the recommended limit for your mobile network operator.
Channel Options
This section shows how to configure advanced options in a channel element. The available options might be different for each channel.
Select a channel element in your flow to open the side panel and configure the following fields.
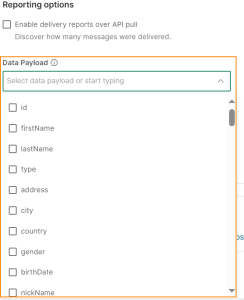
Data Payload
To customize your message, you can add data from stored or imported contacts. Example: first name or country.
In the Tracking and reporting > Reporting options section, select one or more data that you want to include. You can now add this data through placeholders in the message. This data is also included in message reports.
For the Mobile push channel, the predefined data payload is phone number (MSISDN) because of the technical implementation of Mobile push and In-app messages.
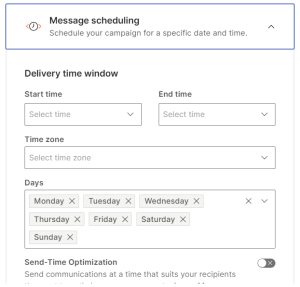
Delivery time window
Set the days, time, and time zone during which the flow sends the communication to end users.
Complete the fields in the Message scheduling > Delivery time window section.
If the channel supports send-time optimization, you can enable the flow to determine the best time to send messages to end users. For more information, refer to the send-time optimization documentation.
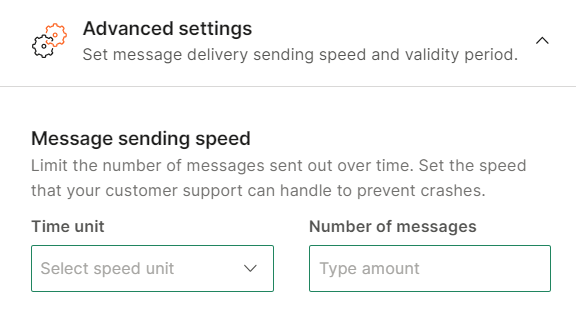
Message sending speed
Configure the number of messages that you want to send within a specified period (minutes, hours, or days).
Example: You configure sending 1000 messages in 1 day. After you set the limit and Infobip receives the first message, the 24-hour period starts regardless of when the daily limit has been met - in the first few hours or later. After the 24-hour period, another 1000 messages will go out.
Use this setting if you want to limit the number of messages that you send. Example: Your flow is for a promo campaign that encourages end users to place orders through your call center. If you send the message to all the audience at the same time, your call center might get high call volumes, which can result in long call wait times for end users. To avoid this situation, send messages at the speed that your call center can manage.
You can configure the Message sending speed in Send elements (Elements such as SMS, Email, and Viber, which send messages) and Call API integration.
Configure the fields in the Advanced settings > Message sending speed section.
Validity Period
Validity period is the period during which the flow tries to deliver the message to the end user's device. Use validity period to set the expiration period for the message.
Example: You want to send a communication to your audience. Some end users have switched off their mobile devices. The system is unable to deliver messages immediately to these devices. The system periodically tries to deliver the message until the end of the validity period.
If the flow is unable to send the message before the validity period ends, the following happens.
- Unable to send for unknown technical reasons: The flow is redirected to the Failed branch.
- For all other reasons: The flow is redirected to the relevant branch.
All messages that you send to end users through channel elements in the flow have a validity period. The default and maximum validity periods are 48 hours.
To set a shorter period, use the Advanced settings > Validity period section in the side panel of the channel element. Specify the Period and select the unit as Hours or Minutes.

Status tracking
This feature is available only for SMS.
You can make sure that the end user goes to the next step in the flow only if the message has either been sent or delivered successfully. To do this, use the message sending and delivery statuses sent by the operator.
You can also assign additional logic to redirect the end user based on the reason the message was not delivered within the specified waiting period.
To wait for the status, do the following:
-
Enable Wait for message status.
-
In the Waiting period field, set the time limit that the flow waits for a delivery or sending status. You can set the time in either Minutes or Hours.
If the flow does not receive the message status within the waiting period, the end user is redirected to the Not delivered branch.
-
In the Branching tab > Wait for status type field, select whether you want to wait for a successful Sending status or Delivery status.
Sending status indicates whether the message has been processed and sent to the next instance. Example: A mobile operator.
NoteThe sending status does not mean the message has been delivered to the handset. For delivery information, use Delivery status instead.
-
If you select Delivery status, the following branches are automatically added to the SMS element:
-
Delivered: Message was delivered successfully.
-
Not delivered (all cases): Includes all delivery failures, including exceeding the time limit to wait for the status. Example: Invalid end user phone number, carrier restrictions, issues with the end user's device, and message filtering.
-
To route the flow based on the cause of delivery failure, add one or more of the following branches:
- Expired: The message was not delivered within the allowed time because of recipient unavailability or network issues.
- Rejected: The message was refused by the recipient's carrier or device. The reason could be that your sender was blocked, SMS filtering options, or other restrictions.
- Undeliverable: The message could not be delivered because of an invalid phone number, network issues, or settings on the end user's device.
For more information about the delivery statuses, refer to Response status (opens in a new tab) documentation.
-
-
If you select Sending status, the following branches are automatically added to the SMS element:
- Sent: Message was sent successfully.
- Not sent (all cases): Includes all sending failures.
-
If you want to build the flow logic based on unsuccessful delivery reasons, save the error code or reason in a flow variable and use it to segment.
Example: Knowing the error code for bounced emails is helpful. A Soft bounce (6011) indicates a temporary delivery issue that may be solved with a retry, while a Hard bounce (6012) is permanent, so it is not recommended to send messages to that recipient again.
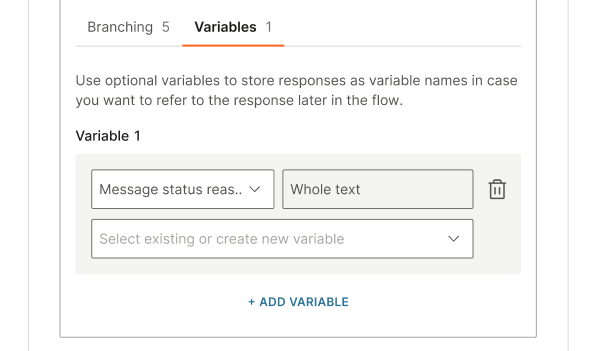
To store the tracking status reason or error code in a variable, do the following:
-
In the Variables tab, select Add variable.
-
Configure the fields in this section.
-
Either select an existing variable or create a new variable.
You can use the variable later in the flow.
-
Channel Metrics
View logs and reports
After configuring and activating the flow, you can view traffic reports for the channel. Go to Analyze and view the channel statistics. You can also generate a report that contains detailed information.
View metrics within the channel element
To get the message data directly from Flow, hover over the channel element to see delivery numbers, click rates, opens, and more. The metrics availability depends on the channel in question.
The following delivery and click rate metrics are available:
- Message send - Number of messages sent by this element.
- Total delivered - Number of engagements delivered by this element. A single person can receive multiple engagements.
- Delivery rate - Percent of sent messages that were delivered.
- Total opens - Number of engagements that were opened for this element.
- Open rate - Percent of delivered engagements that were actively opened by recipients.
- Unique opens - Number of unique people who opened the engagement at least once.
- Click-through rate (CTR) - Percent of delivered messages that resulted in a clicked link.
- Total clicks - Number of links clicked.
- Unique clicks - Total number of unique people who clicked a link at least once.
| SMS | RCS | Mobile push | In-app message | LINE | MMS | |||
|---|---|---|---|---|---|---|---|---|
| TRAFFIC DELIVERY METRICS | ||||||||
| Message Send | YES | YES | YES | YES | YES | YES | YES | |
| Total Delivered | YES | YES | NO | YES | YES | NO | YES | |
| Delivery Rate | YES | YES | NO | YES | YES | NO | YES | |
| OPENS | ||||||||
| Total Opens | YES | YES | NO | YES (Total seen) | YES (Total seen) | NO | YES | |
| Open Rate | YES | NO | NO | YES (Seen rate) | YES (Seen rate) | NO | NO | |
| Unique Opens | YES | NO | NO | YES (Unique seen) | YES (Unique seen) | NO | NO | |
| CLICKS | ||||||||
| Total clicks | YES | YES | NO | NO | YES | YES | NO | |
| Click-through rate (CTR) | YES | YES | NO | NO | YES | NO | NO | |
| Unique clicks | YES | YES | NO | NO | YES | YES | NO | |
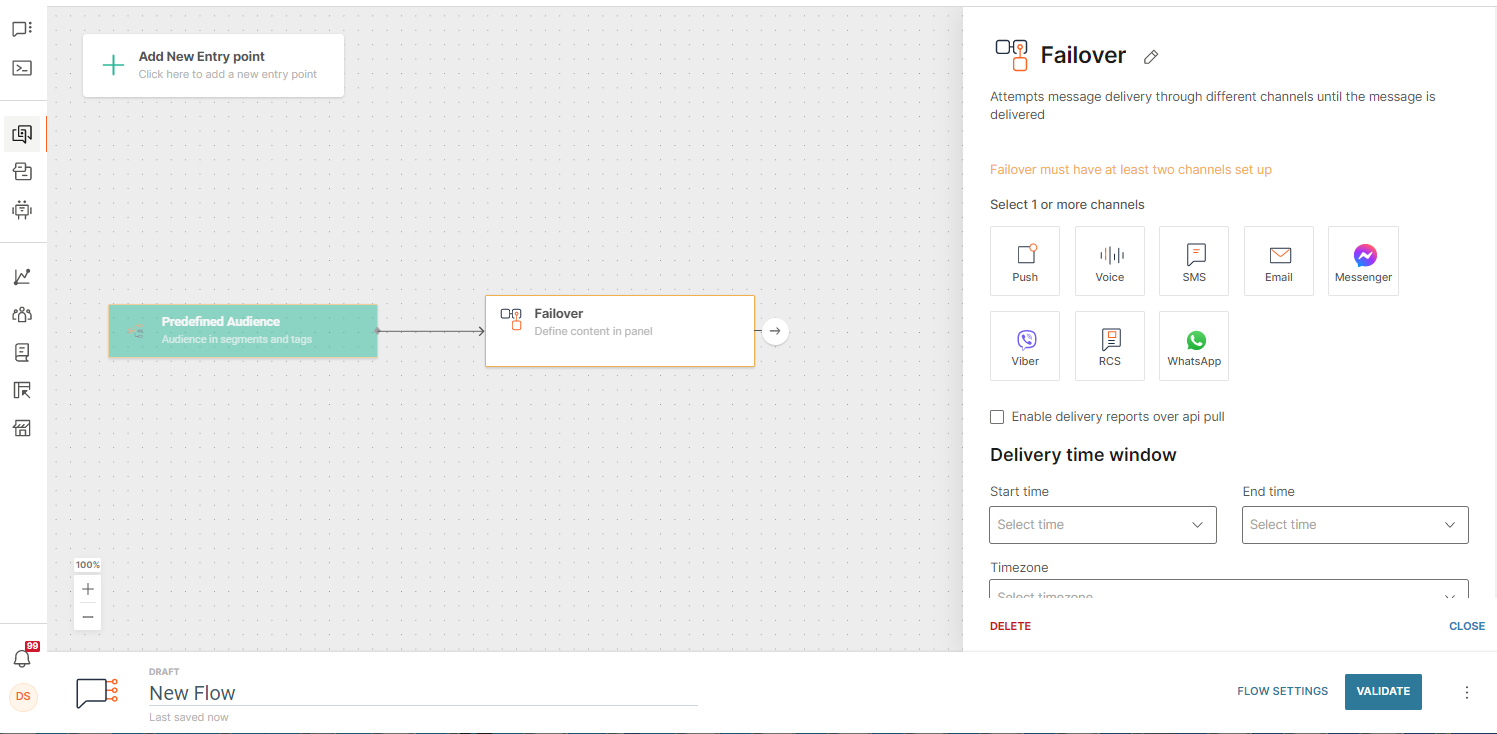
Failover
Secure the message delivery by setting up backup channels. This means that if you send a message over one channel and it's not delivered, another channel of your choice will be automatically used after a defined time.
When designing your campaign, remember that there is a validity period during which the platform will try to deliver the message over one specific channel. The default value is 48 hours. Also, make sure that all the recipients have all the required destinations set in their profiles.
To use this feature, add the Failover element to the flow you are designing and set up the channels.
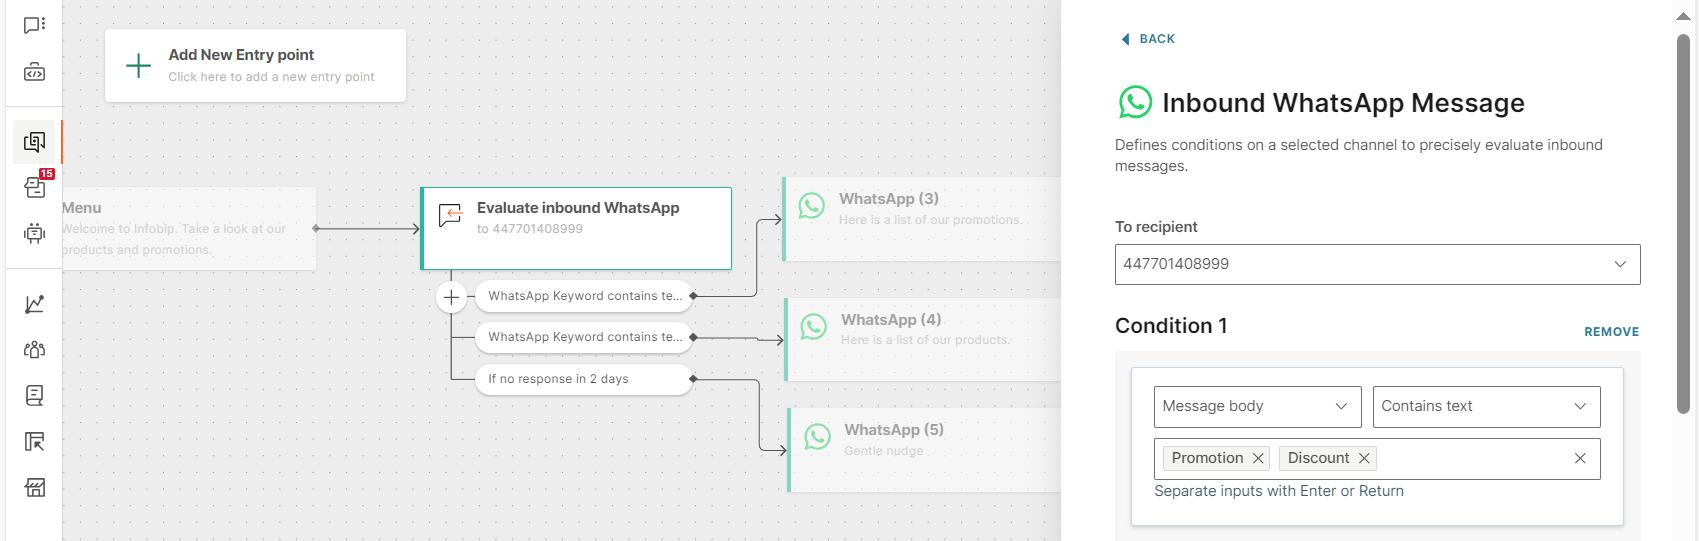
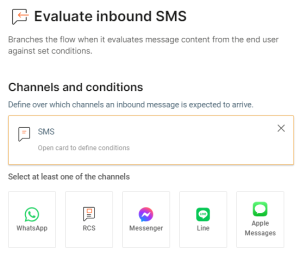
Evaluate Inbound Message
Use this element to branch the flow based on specific words sent by the end user. Example: If the end user replies products, send them a list of all products. If the end user replies promotions, send them a list of only products that have promotions.
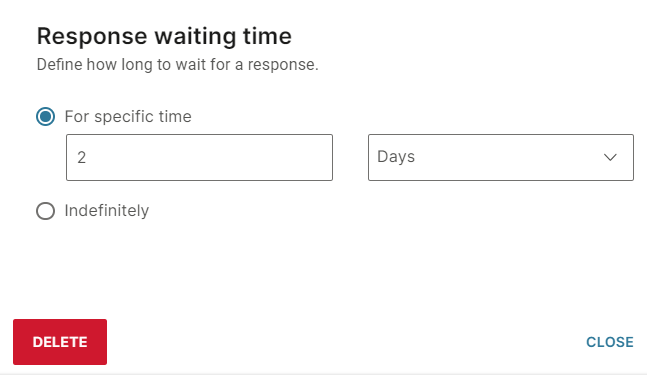
The default output of the element is If no response in 2 days.
Supported channels
- Mobile push
- SMS
- Viber
Configure the element
Follow these steps to configure the element.
- Select the channel for which you want to evaluate the message.
- Select the recipient.
- Define conditions to compare the end user's message with the value that you specify. If the condition is fulfilled, the next step in the flow is triggered.
- (Optional) Save the inbound message information in variables.
- Specify the time to wait for a response from the end user.
For more information, refer to the detailed instructions below.
Select the channel
In the Channels and conditions section, select the channel for which you want to evaluate the end user's message.
The default channel is SMS. To use a different channel, delete the existing channel and select the required one.
Select the recipient
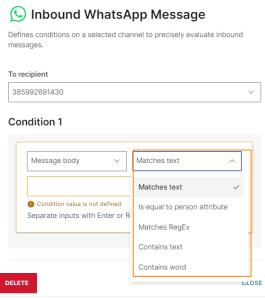
Select the channel name to open the card. In the To recipient section, select the recipient.
Define conditions for the inbound message
Define conditions to compare the end user's message with the value that you specify. Configure the action that the flow needs to take if the condition is fulfilled.
You can specify multiple conditions within the element.
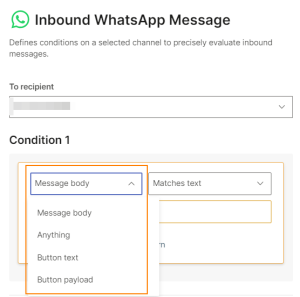
You can set conditions for the following:
-
Message body: Compares the body of the message against the condition value.
-
Anything: Use this option so that end users can continue the flow even if their message contains something that is not included in the conditions.
Exact matches have a higher priority over Anything. Example: You have two flows that are waiting for a message from the same end user. In one flow, the condition is to match the exact word yes. In the other flow, the condition is Anything. The end user responds yes. In this case, the end user continues in the flow that matches the exact word.
-
Button text (WhatsApp only): When the end user selects a button to respond, this condition compares the button text against the condition value.
-
Button Payload (WhatsApp only): When the end user selects a button to respond, this condition compares the button payload against the condition value.
Use the following operators in the conditions.
-
Is equal to person attribute - checks whether the message body contains the person attribute that you select.
The case is ignored when comparing the value.
-
Matches text - checks whether the end user's response matches the condition value exactly. The condition is fulfilled if the end user's response contains only the condition value and nothing else. You can specify multiple condition values.
Example:
Condition value: time
End user's response: time. The condition is fulfilled.
End user's response: timezone, time!!, what is the time? The condition is not fulfilled because the response contains additional characters that are not part of the condition value.The case is ignored when comparing the value.
-
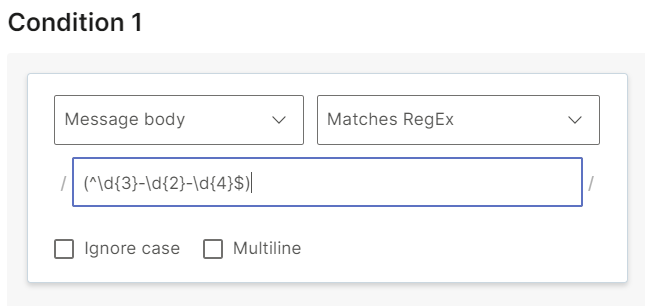
Matches RegEx - checks whether the message body contains a regular expression pattern that you define.
Ignore case (Optional): Specify whether to ignore the case when evaluating the condition.
Multiline (Optional): Use this option when you want to match the input against multiple lines of text. The validation is successful if any of the lines matches.
-
Contains text - checks whether the message body contains the keyword that you specify in the condition value. You can specify a group of characters, such as a symbol or keyword, in the condition value. You can specify multiple condition values.
Example:
Condition value: time
End user's response: time, timeframe, 3times, time!!, what is the time? The condition is fulfilled because the message contains the keyword.The case is ignored when comparing the value.
-
Contains word - checks whether the message body contains the exact word that you specify in the condition value. The word in the message body can have symbols or spaces before or after the word, but must not contain digits or other letters.
Example:
Condition value: time
End user's response: time. The condition is fulfilled because the message contains the exact word.
End user's response: time!!, what is the time? The condition is fulfilled because the message contains the exact word with either symbols or spaces before or after the word.
End user's response: times, timeframe, timezone, 3times. The condition is not fulfilled because the word in the message contains additional characters that are not part of the condition value.The case is ignored when comparing the value.
You can specify multiple condition values.
The system follows the above order to process inbound messages. So, if a condition that has a higher priority is fulfilled, the flow takes the action for that condition and ignores the other conditions.
You can reuse keywords across multiple active flows. Example: Use common keywords such as Yes or No in multiple flows. In cases where 2 or more flows are waiting for the same inbound keyword from the end user at the same time, the end user's input is forwarded to one of these flows randomly.
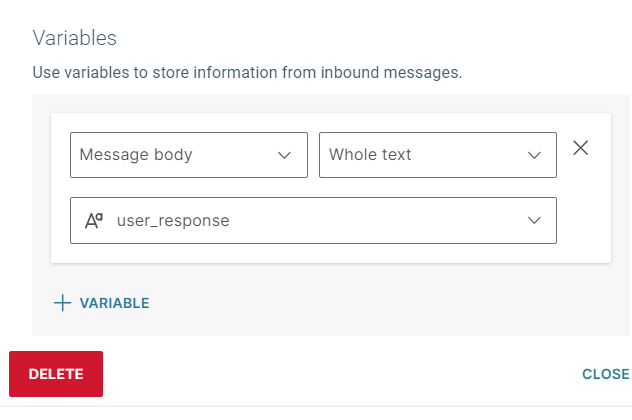
Save inbound message information in variables
You can also define variables to capture and store inbound message information.
Define the data that you want to capture from the inbound message. You can capture the following information.
- Message body
- Recipient
- Sender
- Message ID
- Gateway ID
You can save either the whole or part of the information.
- Whole text: Save the whole of the information.
- RegExp parse variable: Use a regular expression to capture a specific keyword in the message content.
For more information, refer to Flow Variables.
Specify the time to wait for a response
In the Response waiting time section, define how long the flow needs to wait for a response from the end user.