Get started
Get started with RCS Business Messaging by setting up your first sender.
The sender represents your business identity and must be registered before you can send messages to end users. You can complete registration in the Infobip web interface or automate it through the API.
Registration
EARLY ACCESS
Register your RCS sender easily using the self-service process in the web interface (opens in a new tab). This guided flow includes smart validation to ensure accuracy and speed up registration. The system checks your inputs, like file formats and image sizes, in real time. If you upload a logo or banner that does not meet the required specifications, for instance, you will receive an immediate prompt to fix it, preventing any submission delays.
If you prefer to automate sender creation or integrate it into your systems, use the Create RCS sender API (opens in a new tab).
-
Access the registration screen
-
In the web interface (opens in a new tab), navigate to Channels and Numbers > Channels.
-
From the list of available channels, select RCS Business Messaging.
-
In the Request RCS Business Messaging sender section, select Register sender to open the sender registration form.
-
-
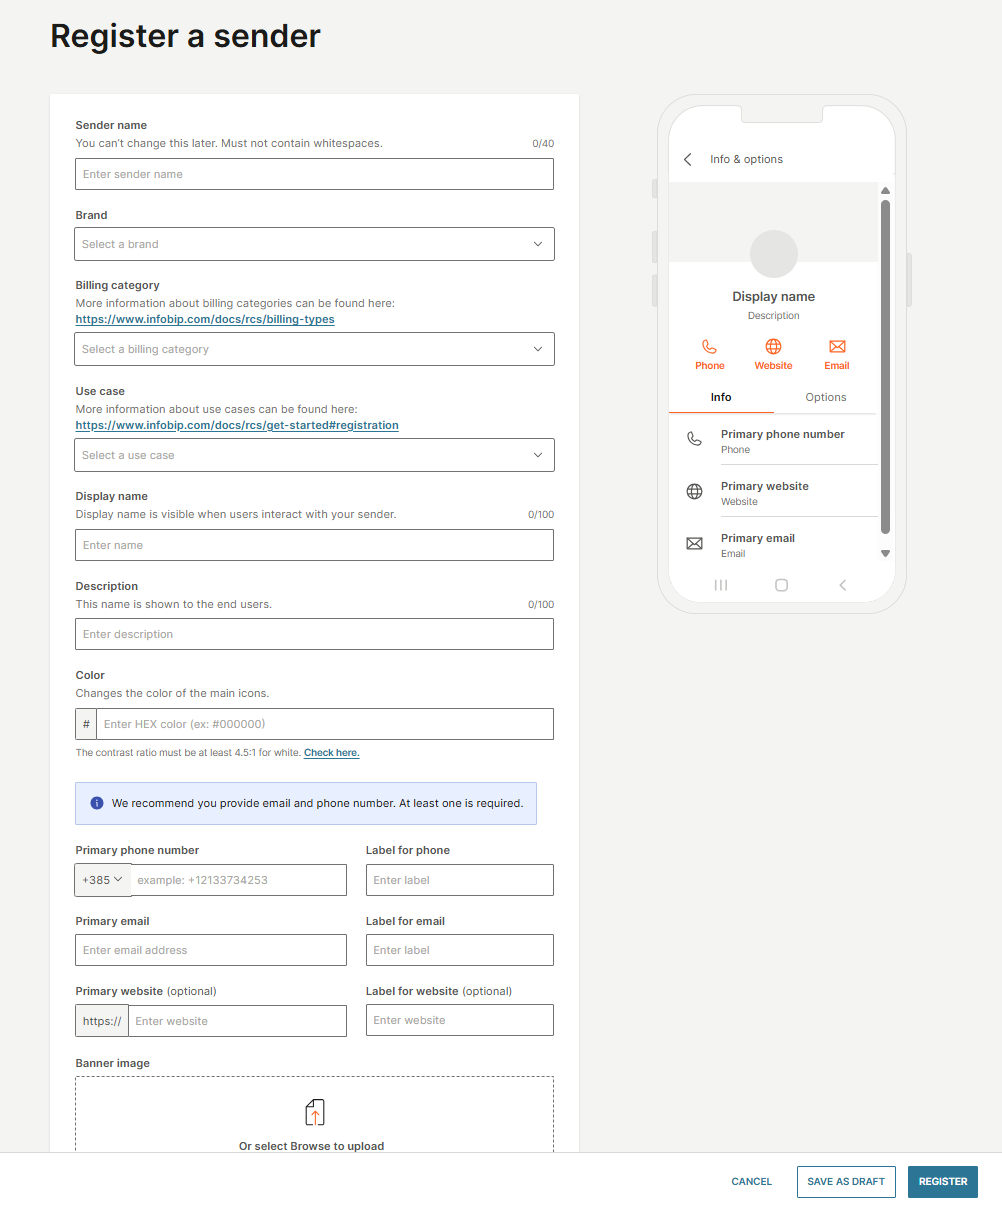
Fill out the sender registration form
- The registration form includes required details for RCS sender setup.
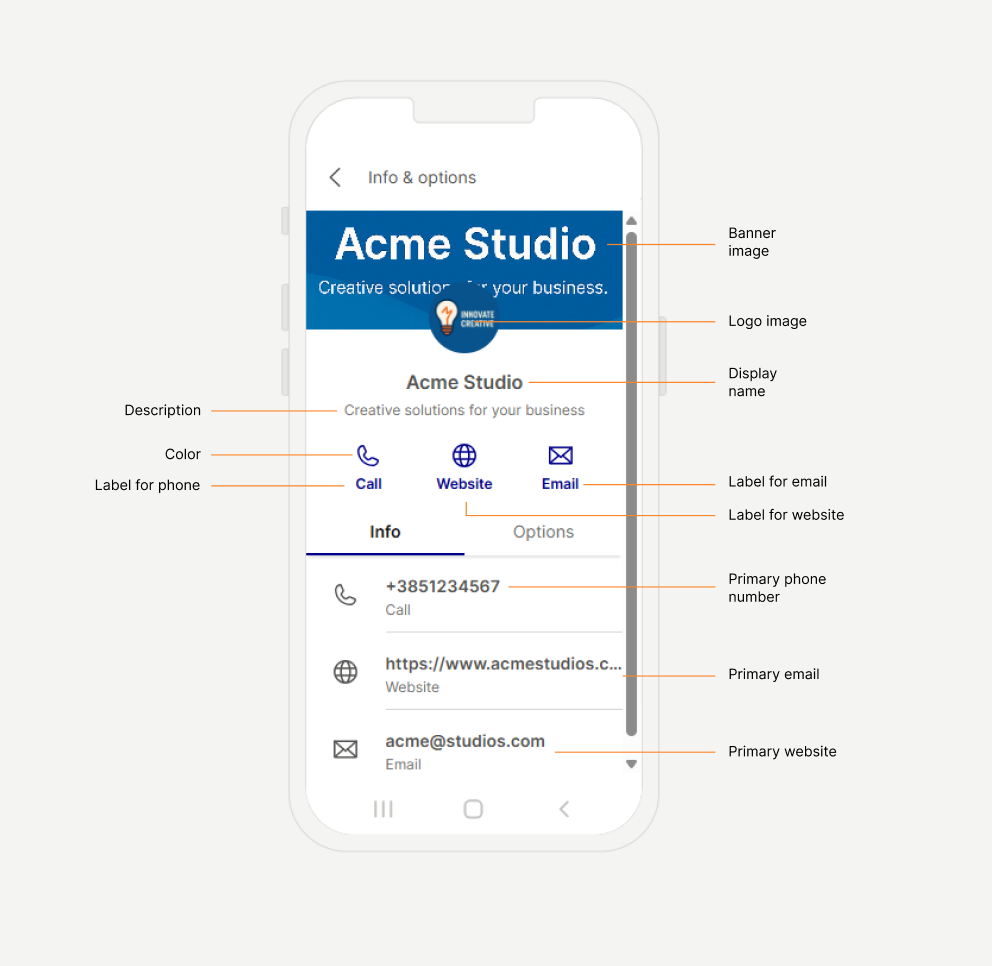
- On the right side of the form, you can see a live preview of how your sender will appear to the end user.
Sender details
Field Description Sender name Unique sender identifier on the Infobip platform. Cannot be blank, include whitespaces, or be changed after creation. Brand Brand associated with the sender. You can select an existing one or create a new one. Brand name is limited to 40 characters. Billing category Defines how messages from this sender are billed:
- Basic message: Billed per message, SMS-style. Ideal for upgraded SMS use cases that primarily send plain text up to 160 characters. Richer content is allowed, but the billing remains basic unless the message qualifies for another category.
- Single message: Billed per message, not as a conversation. Suitable for one-off messages with rich content (such as cards or carousels).
- Conversational: Billed per session that includes multiple A2P and P2A messages. Select this if your sender is designed for two-way communication and complex user interaction.
NoteSingle message and basic message types never trigger conversational billing. Billing is based solely on the content type delivered, ensuring a clear and predictable billing system.Use case Defines the message type:
- One-time password (OTP): Used for account authentication or secure transaction confirmation.
- Transactional: Notifications, alerts, and updates related to a customer's existing services or activities, such as purchase confirmations, delivery updates, or suspicious login alerts.
- Promotional: Sales-driven and marketing content sent to promote awareness, engagement, or purchases. Includes limited-time offers, product announcements, and campaign messages.
- Multi-use: A combination of transactional and promotional flows. For example, notifying a user about account activity and then offering a discount or upgrade for a related product or service.
Display and visual identity
Field Description Display name Sender name shown to end users. Description Short text shown to users on their device. Color Main icons theme color (hex format, for example, #000000). Must pass accessibility contrast rules (4.5:1 for white text).
For more information on contrast requirements, refer to the W3C accessibility guidelines for minimum contrast (opens in a new tab).Banner image JPEG/JPG image in 1440 x 448 pixels. Maximum size: 200 kB. Displayed at the top of the sender's profile. Logo image JPEG/JPG image in 224 x 224 pixels. Maximum size: 50 kB. Displayed as sender’s avatar. Contact details
Field Description Primary phone number End user support number. Must be in E.164 format (for example, +1234567890).Label for phone Display label for the phone number. Primary email Email address of the sender in valid email format. Label for email Display label for the email. Primary website Public site for the brand. Must start with http://orhttps://.Label for website Display label for the website. Legal details
Field Description Privacy policy URL Direct link to the sender's privacy policy. Must be public and start with http://orhttps://.Terms of service URL Direct link to the sender's terms of service. Must be public and start with http://orhttps://. -
Save or register.
Once all required fields are filled in:
- Select Register to submit the sender for approval.
- Or select Save as draft to finish later.
-
Track sender status and registration approval.
After submitting your sender registration form, its status will update in the Infobip web interface, reflecting the approval progress.
To check the status of your sender:
-
In the web interface (opens in a new tab), navigate to Channels and Numbers > Channels > RCS Business Messaging.
-
Go to the Senders tab.
-
Find your sender and check its status:
- Draft: Sender details saved but not yet submitted for registration.
- Pending: Registration request submitted and awaiting initial processing.
- In testing: Sender approved for testing. You can now add test devices and send test messages.
- Launch review: You have submitted the sender for launch. It is under review, and properties (except platform parameters) are locked. Test traffic is still allowed.
- Launch requested: You have requested the sender to be launched. You cannot modify sender properties (except platform parameters), but you can still test.
- Launched: Sender is live in at least one country. Test devices can no longer be added/edited. You can now send production traffic to approved countries.
- Failed: Registration or launch request failed. Contact Support.
Edit or submit your sender for launch
- To edit: While in Draft or In testing status, navigate to the Senders tab, select your sender, and choose Edit sender.
- To submit for launch: Once you have successfully tested your sender (status In testing), navigate to the Senders tab, select your sender, and choose Submit to launch.
-
Test connection
Once your sender status is In testing, you can verify its connection by adding test devices and sending messages. This involves preparing your test device, adding its number for safelisting within Infobip, and then sending a test message.
-
Prepare your test device
Before adding a test number for safelisting, ensure the physical device is ready:
- Enable chat features: On the Android device you intend to use for testing, go to your Messages app settings and ensure RCS chats are enabled and connected. For more information, refer to Google's documentation (opens in a new tab).
- RBM tester invitation: Depending on the RCS technology provider, you might receive a Google tester invitation message on the device after its number is added for testing. If you receive this, select Make me a tester and wait for confirmation.

-
Add test device number(s) for safelisting
Add the phone number(s) of your prepared test device(s) to your sender configuration in Infobip. Only these safelisted numbers can receive test messages from this sender while it is in the In testing phase.
-
Web interface:
- Navigate to Channels and Numbers > Channels > RCS Business Messaging > Senders.
- Select your sender (status must be In testing).
- Go to the Test devices tab.
- Select Add device and enter the phone number(s) in E.164 format (for example,
+1234567890).
-
API:
- Use the Add RCS test number (opens in a new tab) API endpoint. Refer to the API details for request structure and parameters.
-
-
Send test messages
Once the test device is prepared and its number has been added and safelisted:
-
Using Broadcast:
- Navigate to Moments > Broadcast.
- Select Create broadcast, choose RCS as the channel, and add your sender.
- Enter your safelisted test number(s) as recipients.
- Compose messages using various RCS features (text, rich cards, carousels, buttons) to verify appearance and delivery on your test device.
-
Using API:
- Use the Send RCS message (opens in a new tab) API endpoint, targeting your safelisted test number(s). Refer to the API details for request structure and parameters.
-
Configure inbound actions and keywords
Set up actions and keywords for inbound messages to automate message processing, reduce manual handling, and improve message management. With this feature, you can configure specific actions, such as forwarding to an HTTP endpoint, and define keywords to trigger those actions.
To configure inbound actions and keywords for RCS, follow the steps below:
-
In the web interface (opens in a new tab), go to Channels and Numbers > Channels.
-
Select RCS Business Messaging and navigate to the Senders tab.
-
Choose the sender, then select the three dots menu > Edit configuration. Configure the inbound actions and keywords as needed.
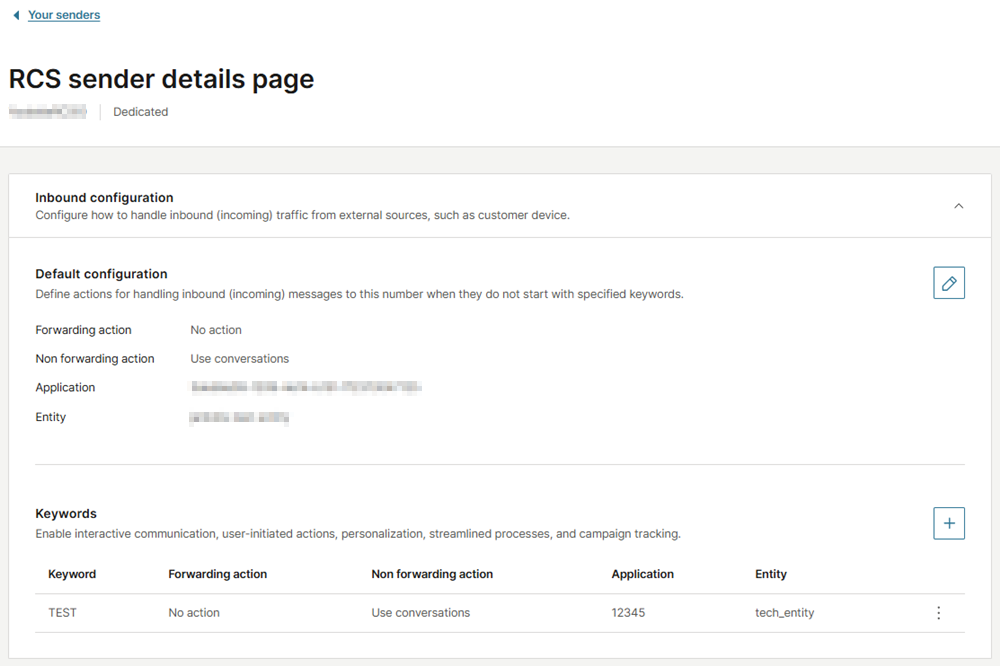
Supported actions for RCS:
- Forwarding actions: Forwarding to HTTP, No action
- Non-forwarding actions: Conversations, Auto response, Blocking action
For more information, refer to Messaging actions and Keywords sections.
Verification and launch
To initiate the launch process, provide the following information in the relevant launch request form (which your account manager will share with you):
The information requested can differ depending on the carrier.
| Info | Details |
|---|---|
| Branding | Legal name of the brand's parent company. Website of brand's parent company. |
| Brand point of contact | Name, job title, and email address. |
| Agent experience |
|
| Usage |
|
Infobip will request the RCS technology provider or MNO to verify the sender. Some MNOs require you to complete additional checks to use their services. Contact your Infobip account manager for more information.
After the launch is approved, you can send unlimited RCS messages and campaigns without additional testing or clearance. You do not need to invite the contacts as testers or safelist their numbers.