Create an AI assistant
Guidelines
-
Use the same language throughout the assistant. Example: Training documentation and prompts.
-
Be consistent throughout the assistant. Example: Brand name, purpose, documentation content, and prompts. Otherwise, the assistant might not provide the correct responses.
Example: If you upload documentation for the Answers product and write the prompt You should be a helpful chatbot for the Conversations product, the assistant sometimes says that it is for Answers and sometimes for Conversations.
Create the assistant
-
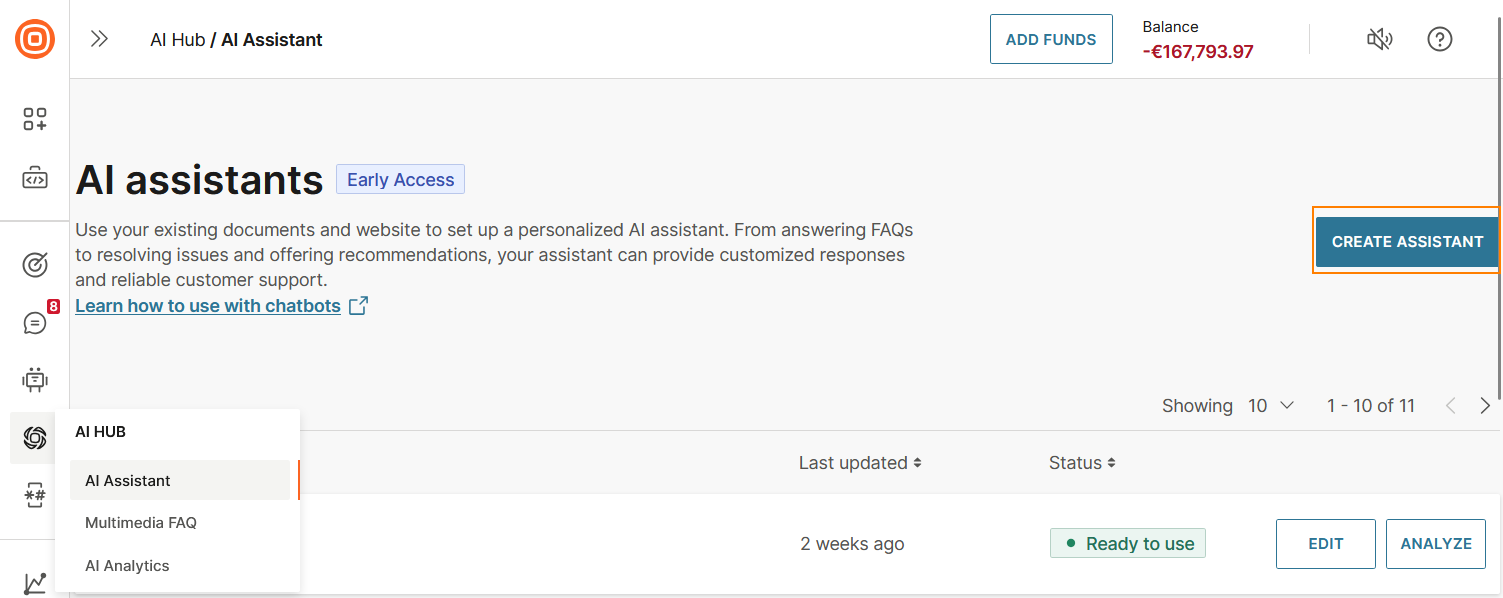
On the Infobip web interface (opens in a new tab), go to AI hub > AI assistant.
-
Select Create assistant.
-
Name the assistant so that it can be uniquely identified. This name is not shared with the end user.
-
Configure the settings.
-
Select Save.
Configure the settings
To set up the assistant, do the following in the Assistant settings section.
-
Configure the assistant through one of the following ways:
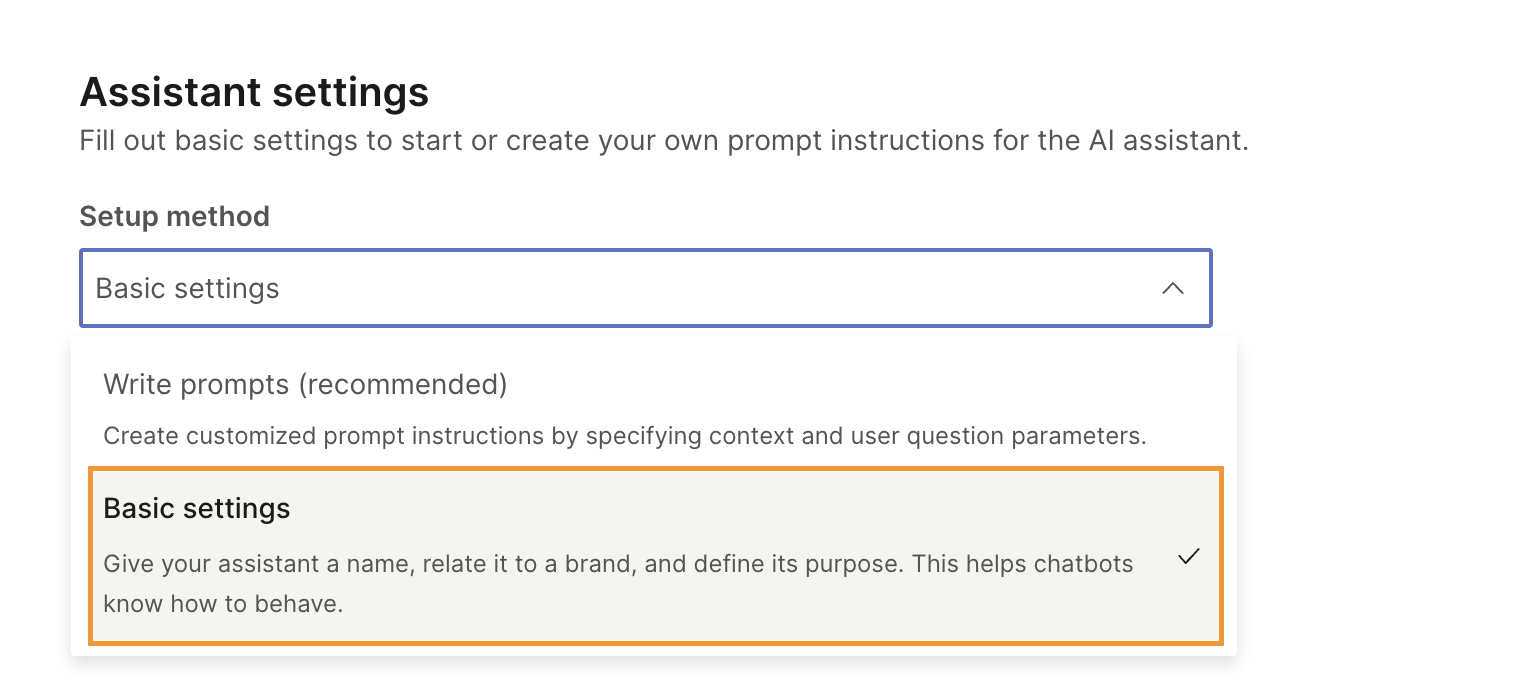
- Basic settings: This option is easy to set up. But the settings are fixed and are used for all end user interactions. There is limited customization and no adaptability. Use this option for testing the assistant.
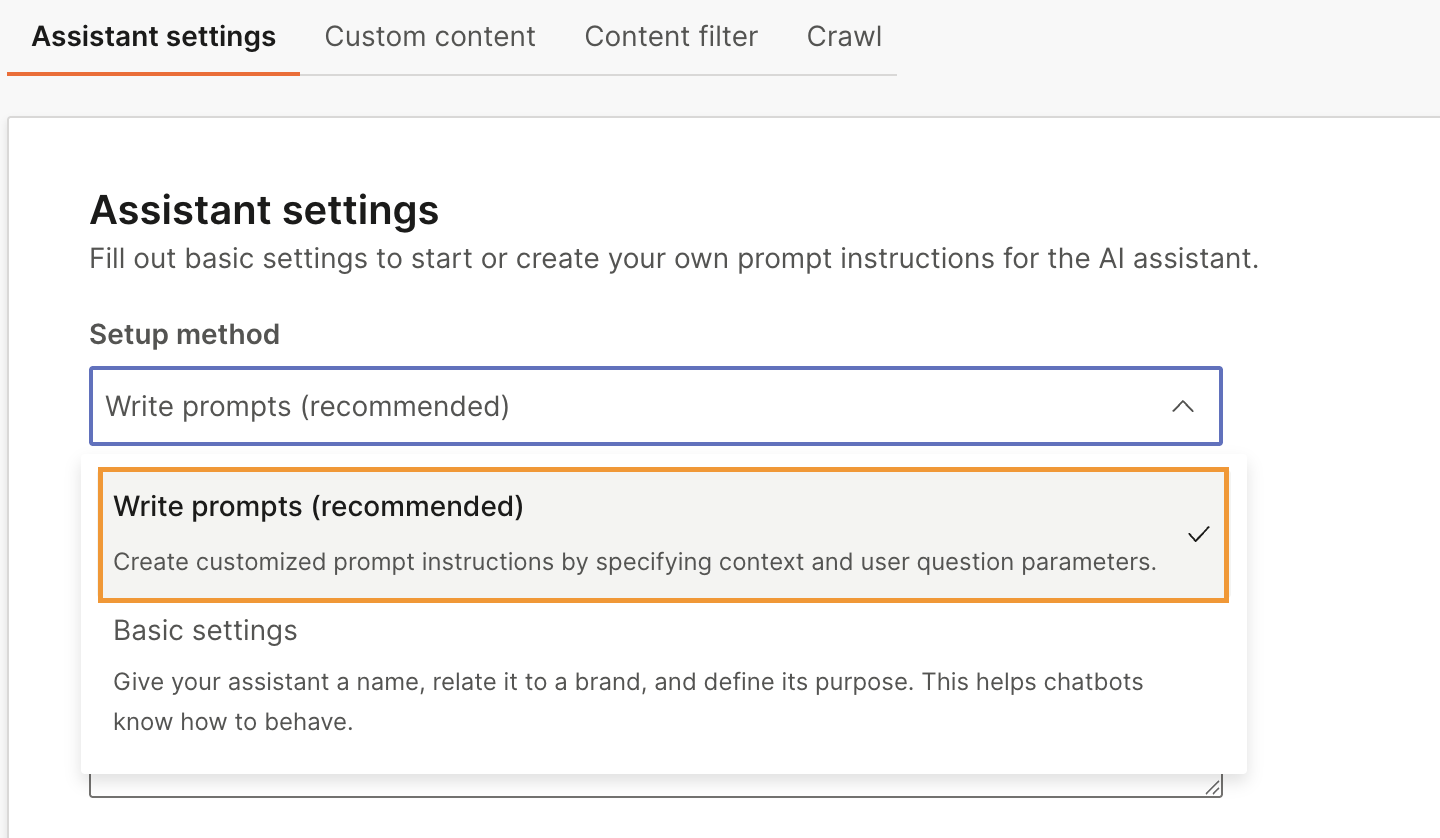
- Write prompts (recommended): This option enables you to guide the assistant's responses. It increases customization and adaptability. Use this option for better results and higher accuracy.
-
(Optional) Configure advanced AI settings.
Write prompts (recommended)
Specify instructions that the AI assistant uses to generate a customized response to the end user's question.
Configuring prompt instructions overrides the Basic settings configuration. However, it does not affect the Advanced settings.
Setup method
In the Setup method field, select Write prompts.
Prompt template
This parameter is a replacement for the name, brand, and purpose, which are present in the basic settings.
Include the following information in the prompt template:
-
The following mandatory variables, without any changes.
- {context_str}: Relevant information from the documents that you upload.
- {query_str}: The end user's question.
-
The following variable is optional
- {prompt_var}: A variable that can be set at runtime, adding additional context to the prompt.
The text {context_str}, {query_str}, and {prompt_var} must be in English.
-
(Optional) You can also include instructions about the persona of the assistant to tell the assistant how to respond to the end user's question. Example: Be formal, friendly, funny, or include emojis.
Example of simple prompt template
This is your context:{context_str}, answer the question:{query_str} using context.Example of detailed prompt template
- You are a helpful chatbot for Infobip's products and services.
- Your name is Omnia.
- This is your context:{context_str}.
- Answer the question:{query_str} using context in a friendly style.
- Include appropriate emojis in your response.
- Address the user as {prompt_var}.
Initialization settings (Optional)
Provide instructions or guidance to the AI assistant for generating the response. These instructions determine the behavior, context, and expectations of the AI model during the conversation.
System message: Provide context, instructions, examples, and guidance that the AI assistant needs to follow to generate the response. Use this feature to define error handling and good examples. The instructions in this field define the behavior of the assistant during the conversation. You could set the assistant's personality or give instructions that you want the assistant to follow.
Example:
- You are a chatbot. Your name is Omnia.
- Omnia, you represent Infobip. You should be a helpful chatbot for Infobip's products and services.
- You should have a friendly conversation with users and help them with questions related to Infobip.
- You will receive paragraphs extracted from a long documentation as a context to answer questions from users.Use system messages to clearly define the roles and scope of an assistant's capabilities and limitations.
Basic settings
Use this feature for testing the assistant. For better results and higher accuracy, use the Write prompts option.
Configure the following in the Assistant settings section.
Setup method
In the Setup method field, select Basic settings.
Chatbot purpose
Add the purpose of the AI assistant. The purpose helps to align the AI assistant with your brand's objectives.
Complete the sentence You should be a helpful chatbot for.
Example: Infobip products and services.
Assistant name (Optional)
Add the name that the assistant uses to introduce itself to the end user. Make sure that the name is consistent with your brand.
The name helps end users recognize your brand. Also, talking to an assistant that has a name makes communication more natural.
If you do not add a name, the AI assistant introduces itself as AI assistant.
Brand name (Optional)
Add the name of your company or your brand. Example: Infobip.
If you add a brand name, the assistant tells the end user that it represents the brand. Thus, the brand name helps establish the identity of your brand. Adding the brand name also aligns with brand consistency across your support channels.
If you do not add a brand name, the assistant does not mention a brand.
Advanced AI settings (Optional)
Token
A token is the basic unit of text that enables the AI assistant to analyze, understand, and generate responses.
Example:
Original text: Here's how you can create a chatbot. Contains 36 characters.
Text divided into tokens: Here's| how| you| can| create| a| chatbot|. Contains 8 tokens.
Parameters
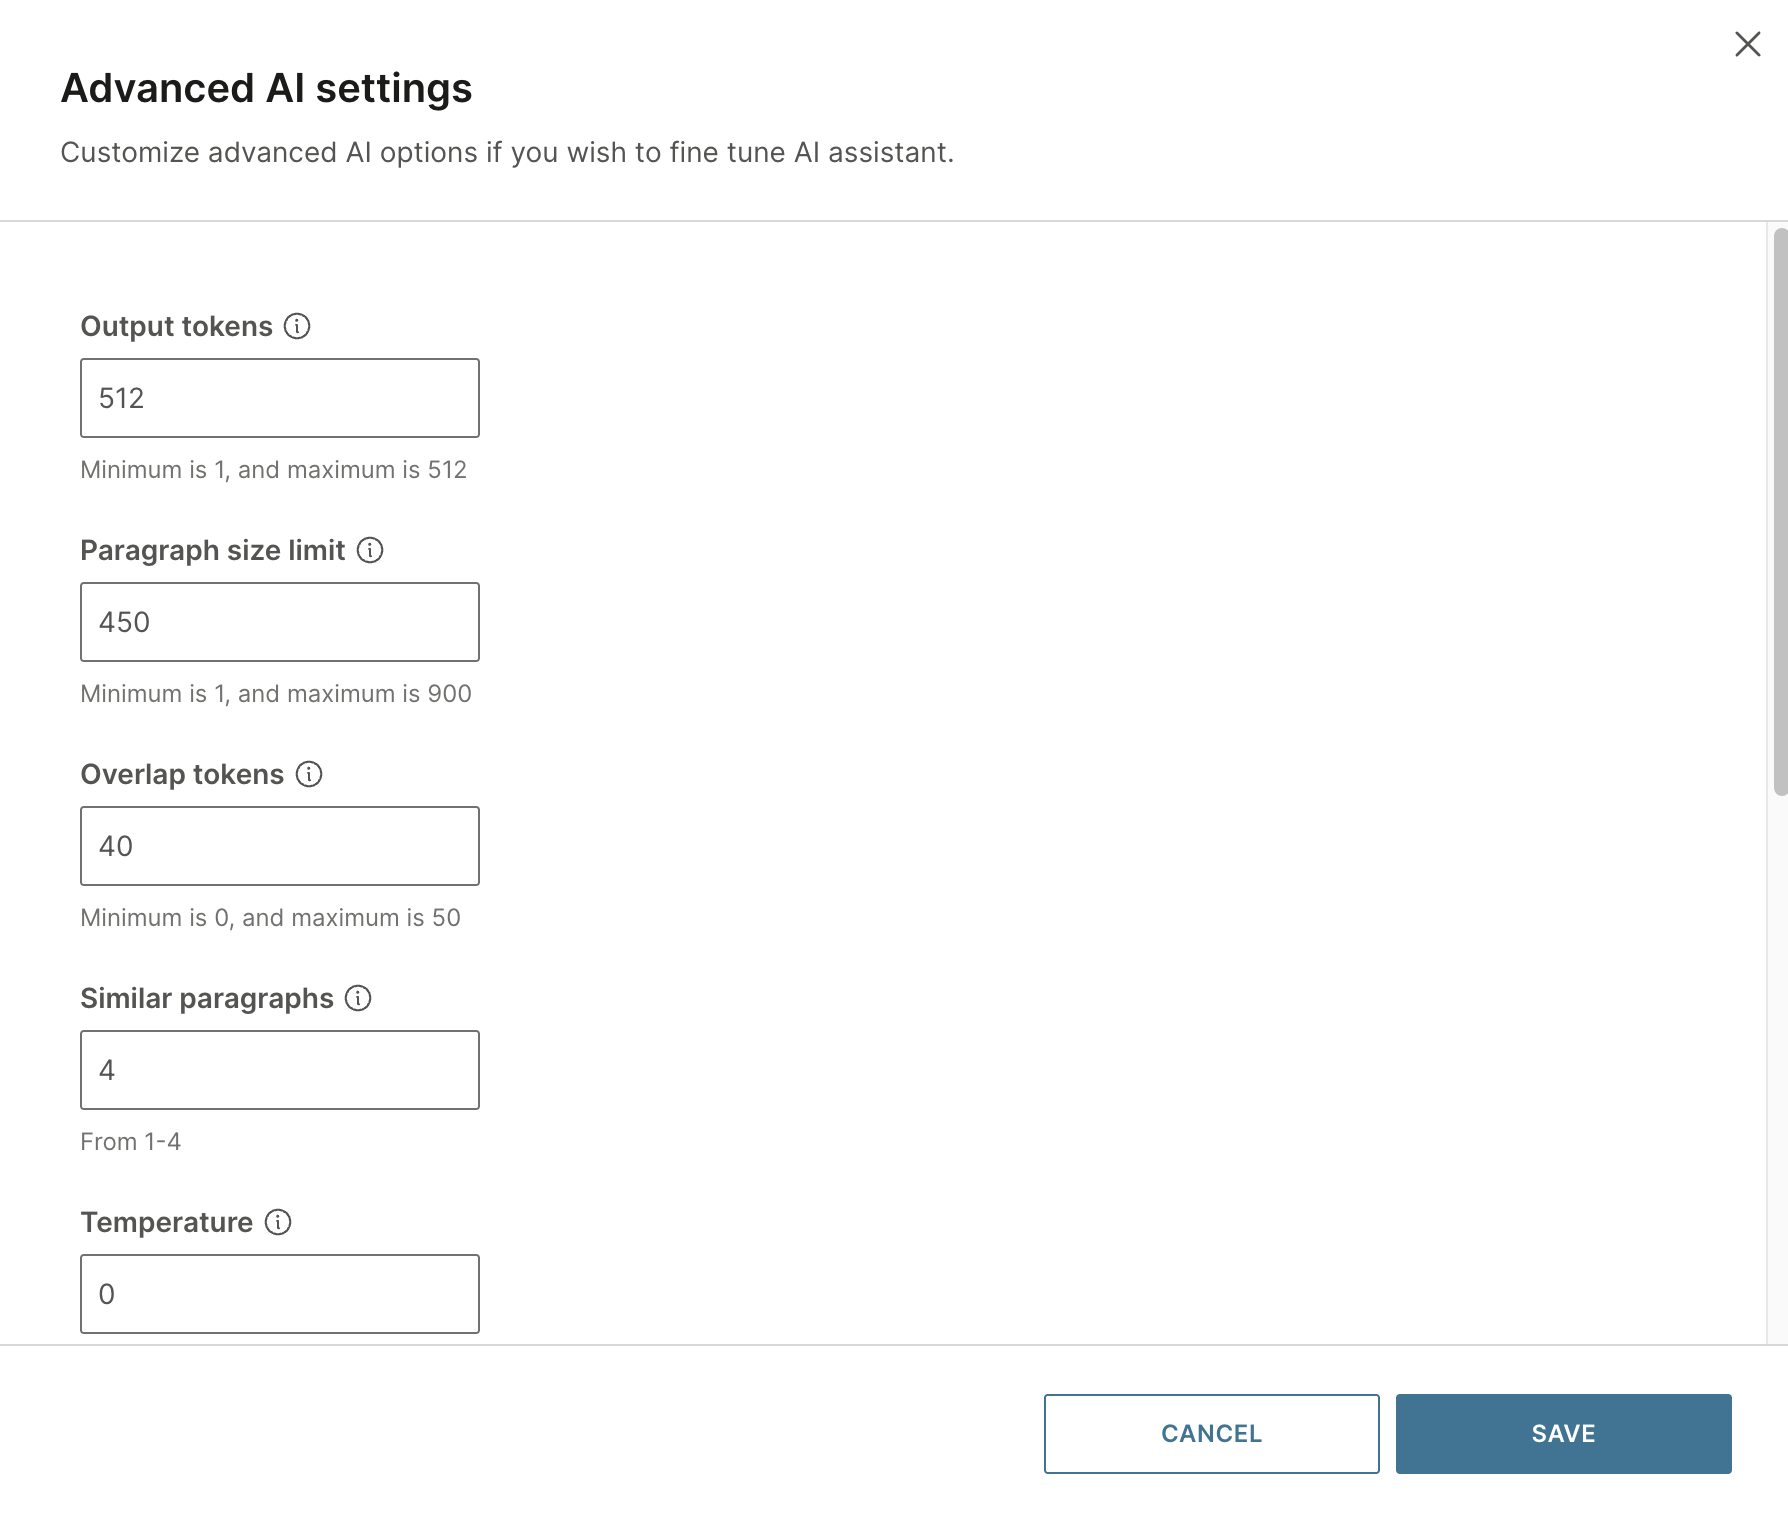
In the Assistant settings tab, select Edit Advanced settings.
Configure the following:
Output tokens (Optional)
Configure the maximum number of tokens that the assistant can use in a response. The number of tokens affects the length of the assistant's response.
If you enter a low value in this field, the response is truncated. So, configure a minimum of 300 tokens.
Paragraph Size Limit (Optional)
The assistant divides the response into paragraphs to enable readability.
Configure the maximum number of tokens in a paragraph in the assistant's response. This determines the size of the paragraph.
Set a value of 300 for small documents and 800 for large documents.
Specifications: Minimum of 100 and a maximum of 900 tokens. The default value is 450.
Overlap Tokens (Optional)
When the assistant's response is divided into paragraphs, it is possible that the information required by the end user is present at the end of one paragraph and the beginning of the next paragraph. To avoid this issue, configure the assistant to overlap the end of one paragraph with the beginning of the next one.
Overlapping the content also controls repetition and enables variety in the assistant's response.
Configure the number of tokens that overlap. Set a value of 20 for small documents and 40 for large documents.
Specifications: Minimum of 10 and a maximum of 900 tokens. The default value is 40.
Similar paragraphs (Optional)
When an end user asks a question, the assistant searches the uploaded documents and identifies paragraphs that have the highest possibility of containing the answer. The assistant processes these paragraphs and generates a response based on the information in these paragraphs.
Configure the number of paragraphs that the assistant needs to process to generate the response.
For small documents, set a value of 1. For large documents in which the same topic is mentioned in multiple places in the document, set a value of 3.
Specifications: Minimum of 1 and a maximum of 3 paragraphs. The default value is 3.
Temperature (Optional)
Configure the level of randomness in the generated response.
A response that is generated at a lower temperature can be focused, conventional, and predictable, whereas a response that is generated at a higher temperature can be creative, random, and varied.
Set the value to 0 to generate answers as close to the source material provided.
Specifications: Minimum of 0 and a maximum of 2. The default value is 0.
Avoid a high temperature because the assistant might give incorrect and unclear responses.
Conversation memory and context recall
Enable this parameter if you want to save the chat history and generate responses based on this history. Using the chat history maintains continuity in the conversation.
To generate precise responses that are based on the end user's question and not based on the chat history, disable this option.
Session window
Define the Session Window size to specify how many previous messages the assistant should remember.
Each number in this parameter represents a user question and the corresponding answer from the assistant.
- A smaller session window focuses on recent messages, making responses more predictable. However, the assistant may lose track of earlier parts of the conversation.
- A larger session window keeps more of the conversation history, helping maintain continuity. However, it may also include irrelevant details, which can affect response quality.
Add documentation
To generate responses, the AI assistant relies on the information that it receives. So, it is essential that the AI assistant uses the relevant documentation.
Example: Your AI assistant is trained with your product documentation. The AI assistant uses this documentation to generate responses to end user queries.
You can add documentation in one of the following ways:
- Create your own documentation and upload the file. Follow this option to get the best results.
- Use a crawler to download the content of a website, review the content, and then upload it to the assistant.
Create your own documentation
Create your own documentation and upload it as a .zip file.
Follow these guidelines to create the documentation.
Guidelines for the documentation content
- Use structured documentation.
- Do not add information about multiple topics in the same document. Use different documents instead.
- When using multiple documents in the zip file, make sure that the data is clean. Doing so helps the assistant provide more accurate responses. Avoid the following:
- The same content is present in multiple places
- Different definitions of the same concept
- Incorrect or outdated information
- Information about similar products in the same document
- The content needs to be in .pdf, .json, .txt, or .docx formats. If your document is not in one of the supported formats, copy or save the content to a document in the supported format.
- Remove images from the documents.
Upload the documentation
Upload the documentation as a .zip file. The AI assistant can access only the documents that you upload to this section.
Guidelines and limitations for the file
- You can upload documents only as a .zip file.
- The maximum file size for the zip file is 7 MB.
- You can upload only one zip file.
- You can use multiple documents in the .zip file.
- Supported file types for the documents in the zip file are .pdf, .json, .docx, and .txt.
- You can use documents of different supported file types in the same zip file.
- Upload all the documents as a single folder in the zip file. Do not create subfolders.
- The order in which you add the documents to the zip file is not important.
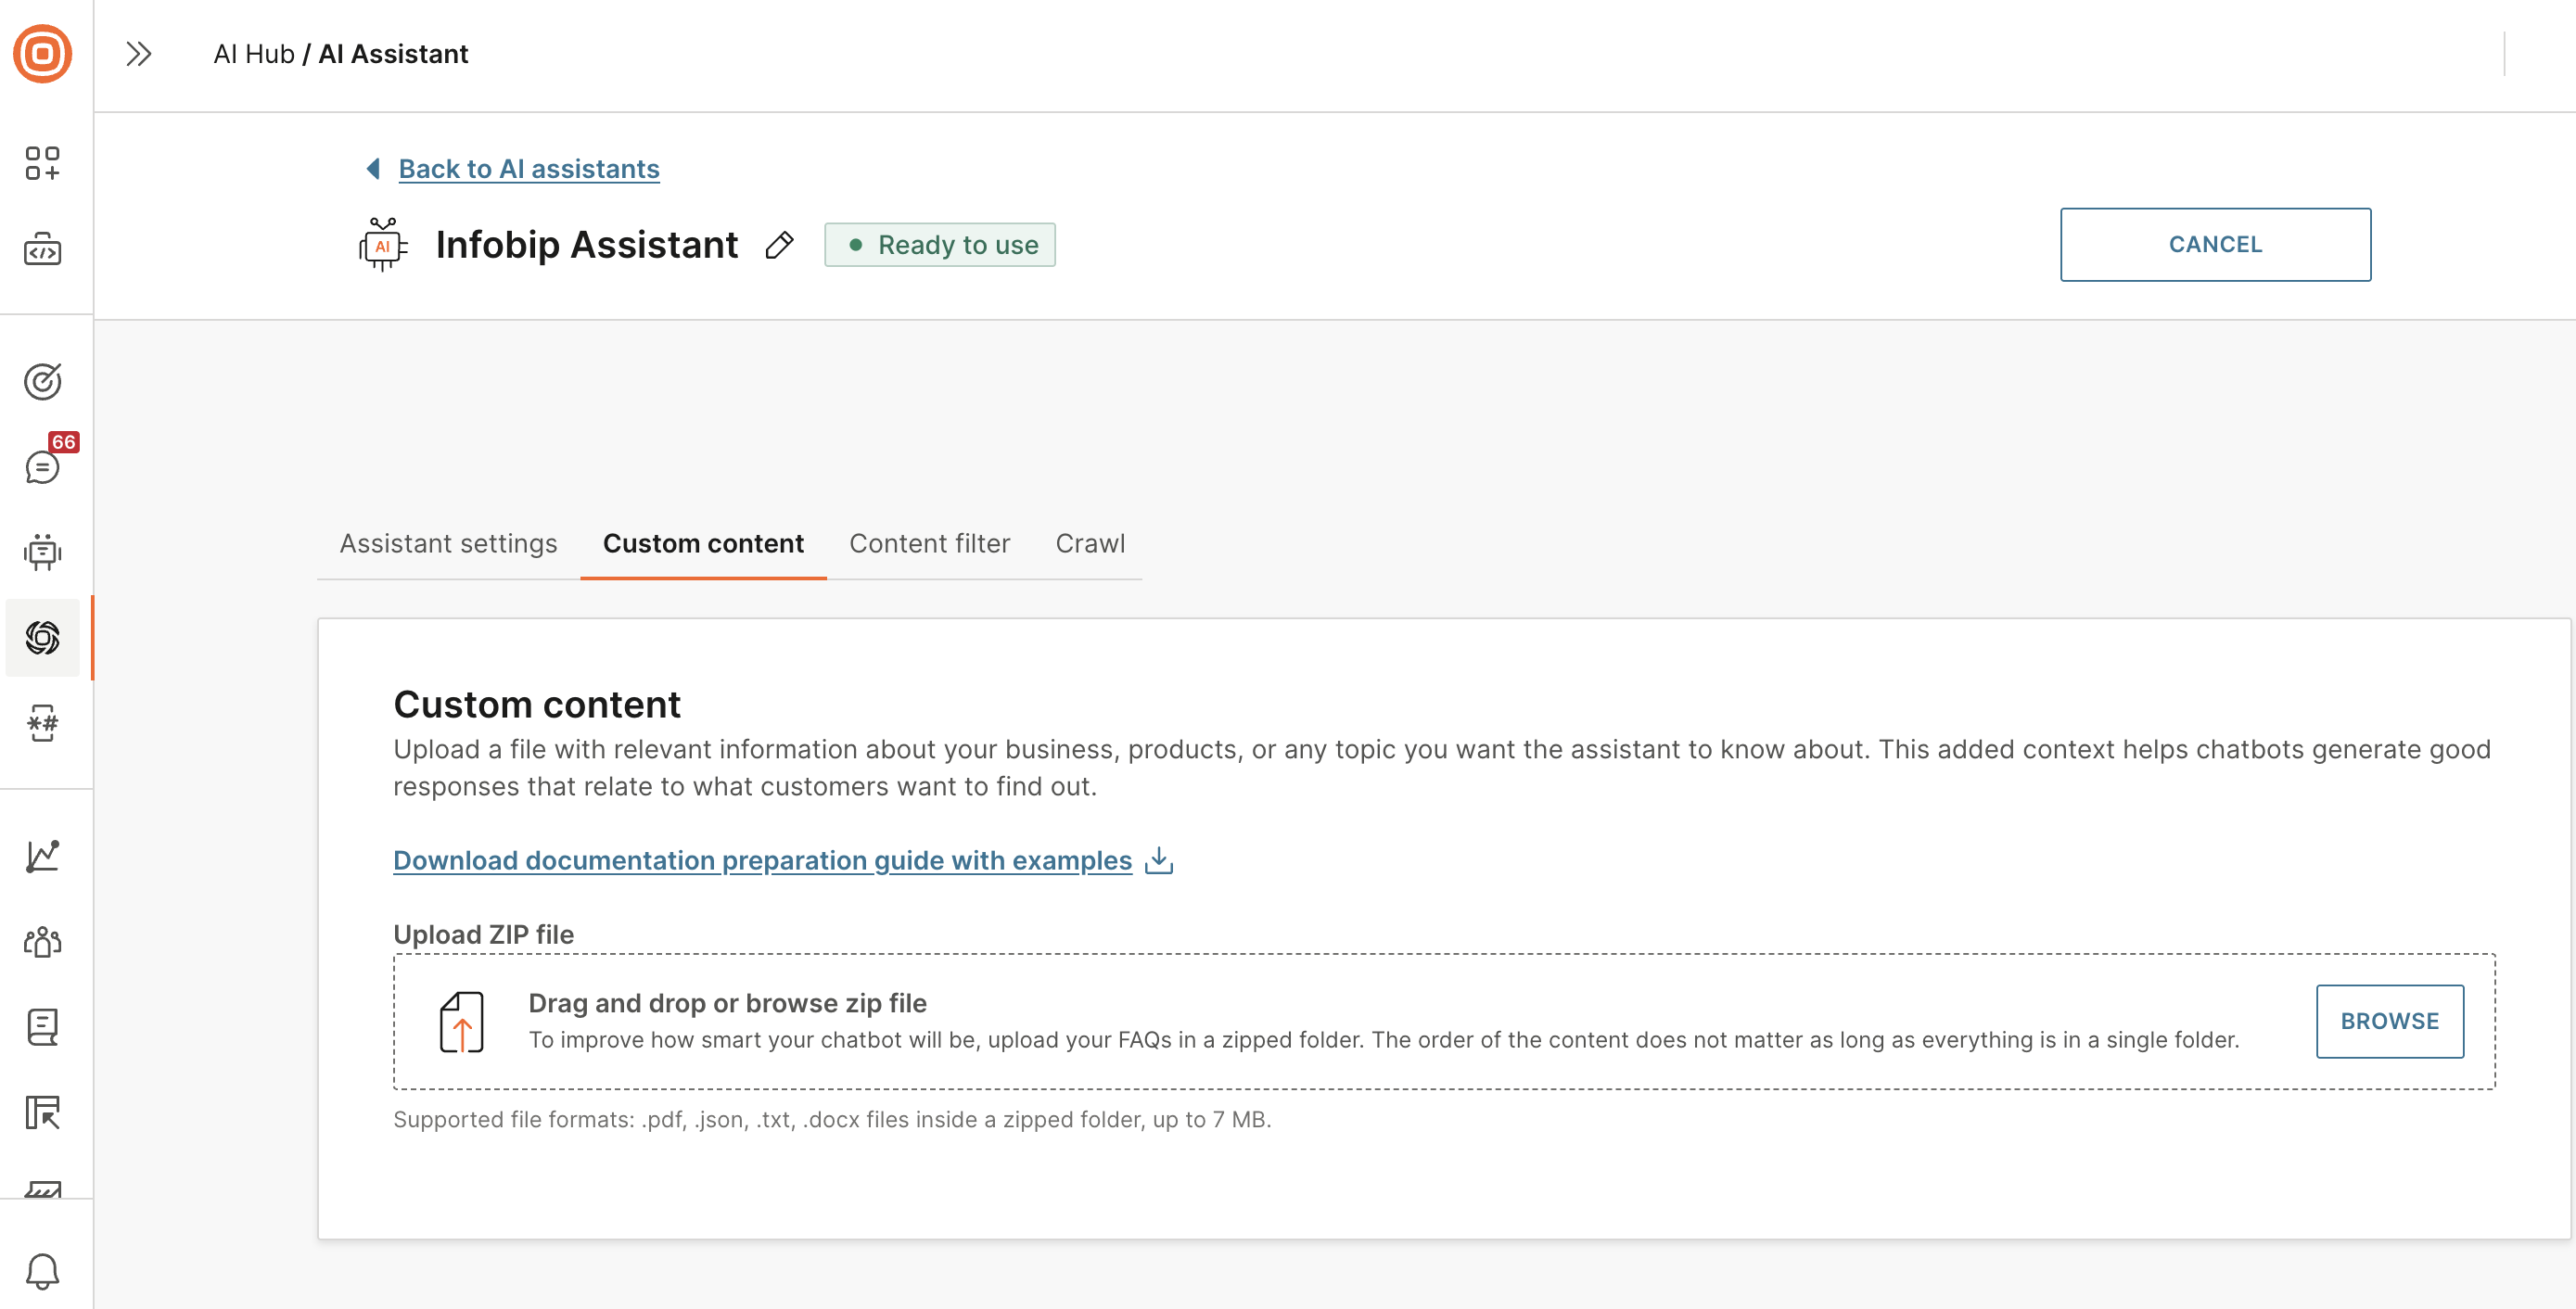
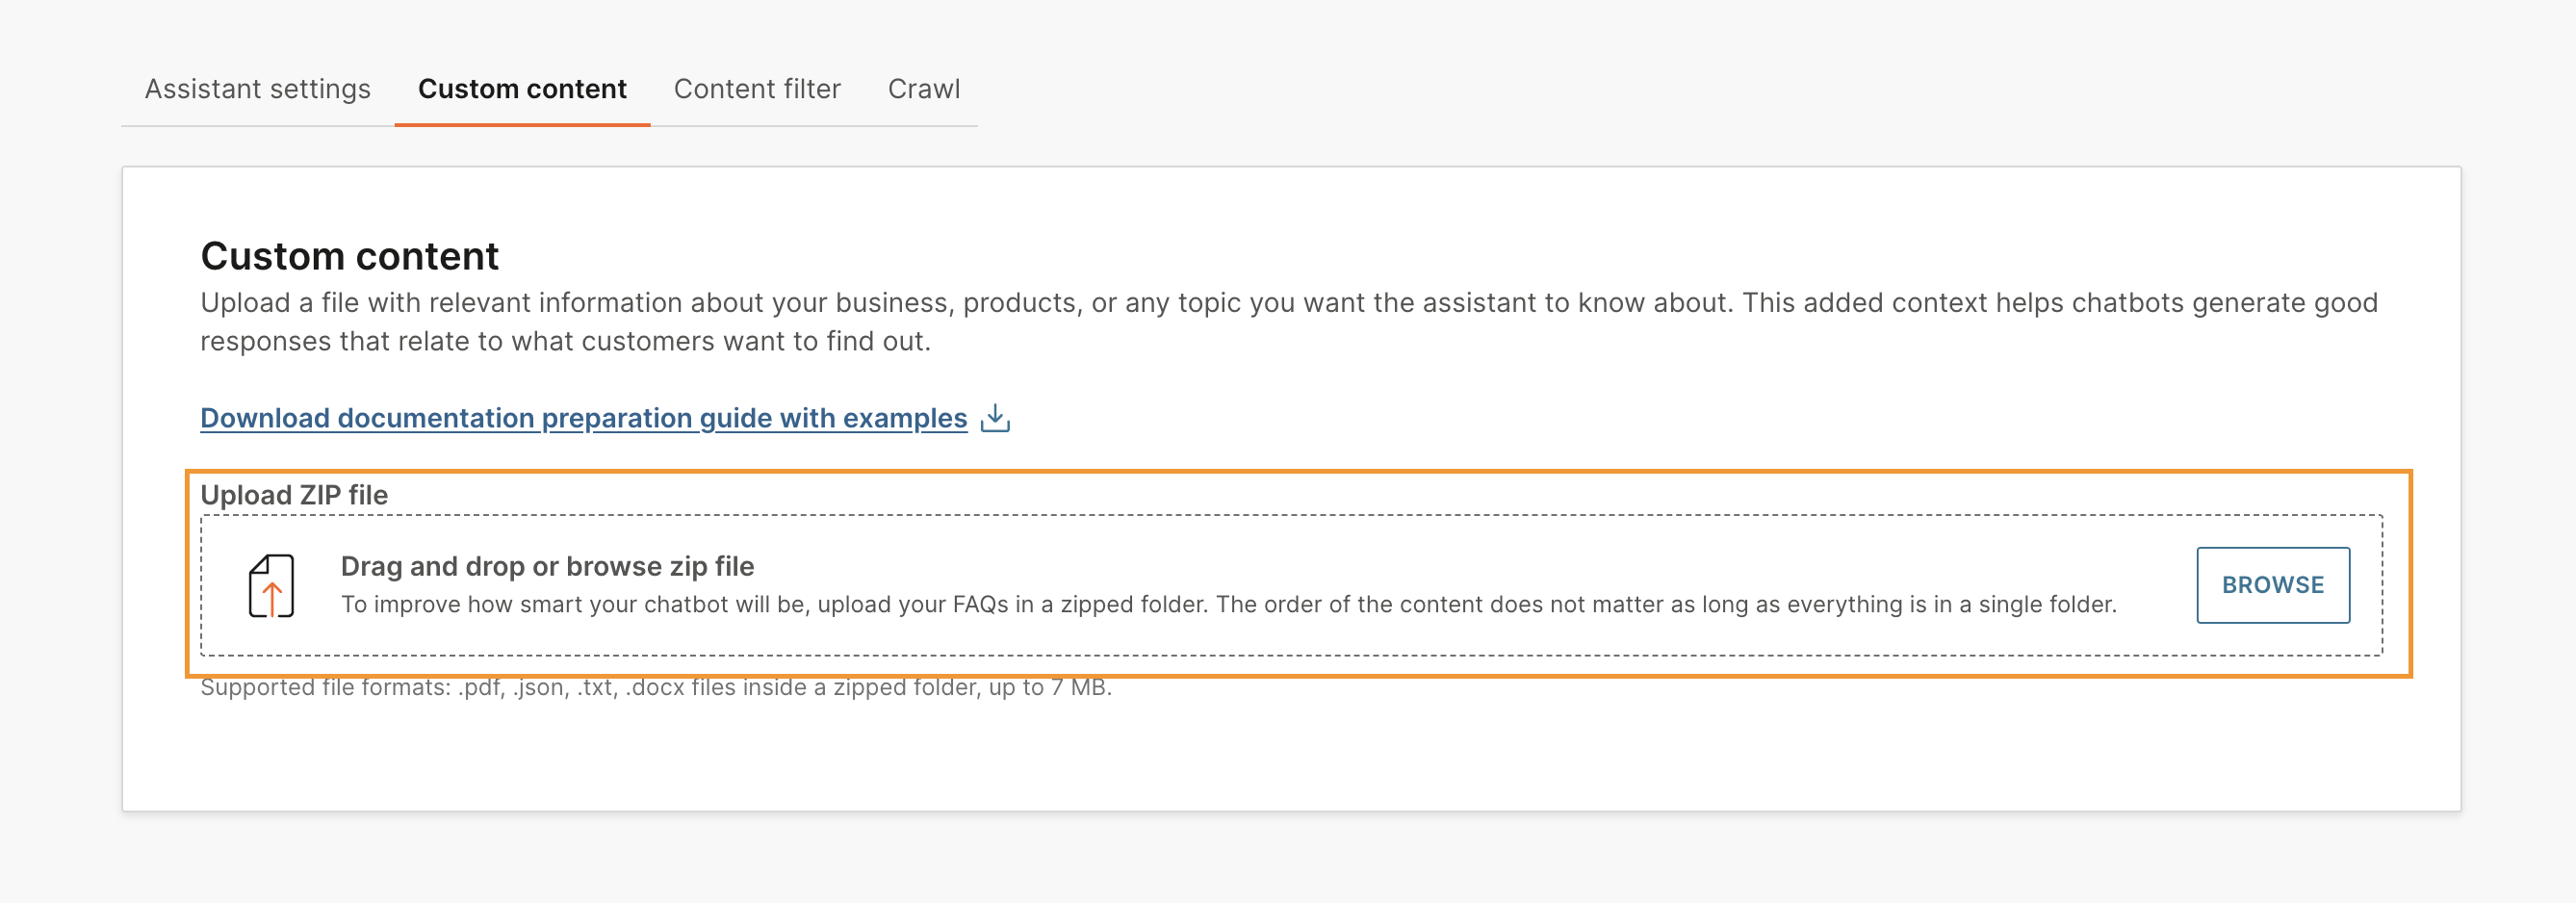
Upload the zip file
- In the Custom content tab, go to the Upload zip file section.
- Either select Browse to find and upload the zip file or drag and drop the file into the section.
If you make changes to your assistant's configuration, you will need to re-upload your documentation.
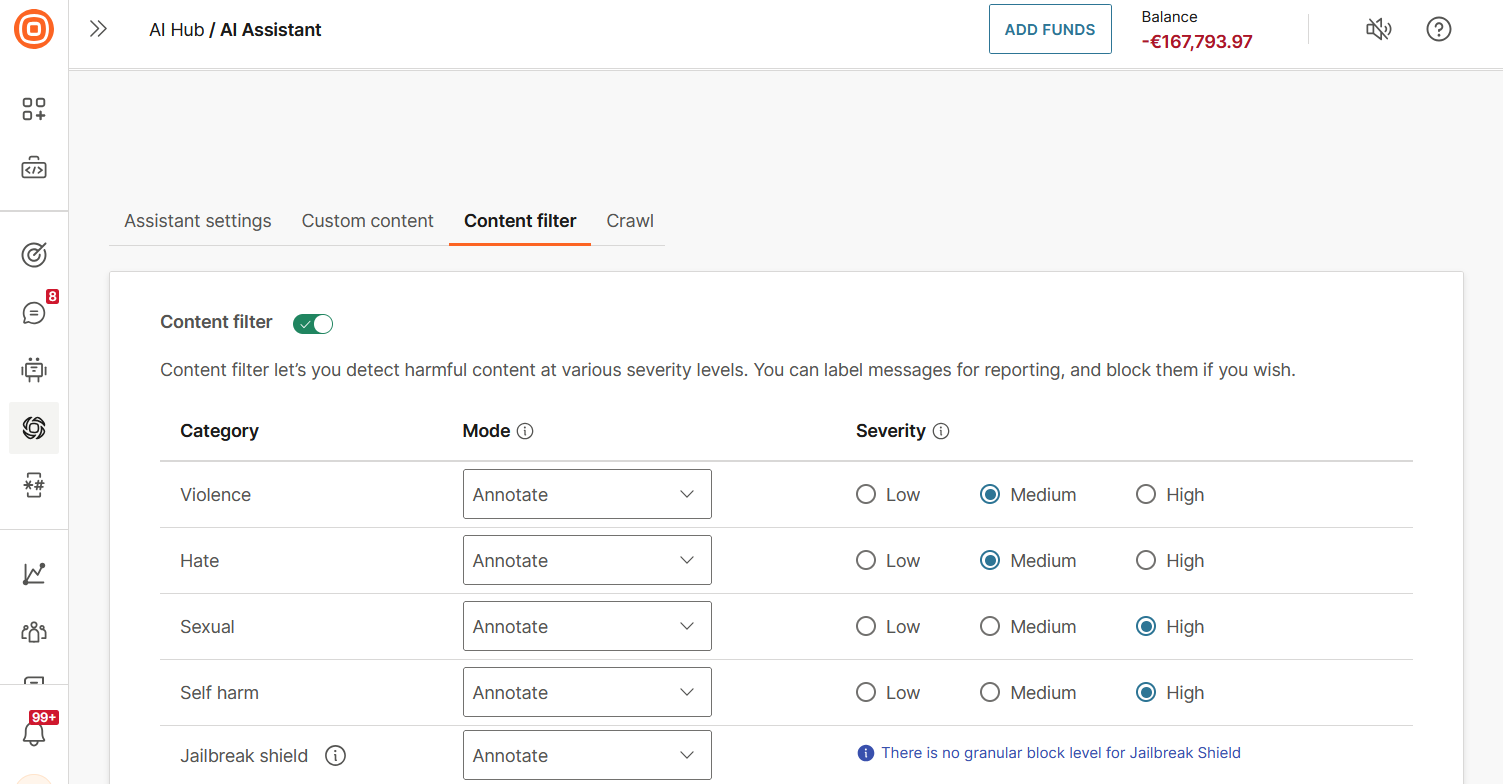
Filter the content (Optional)
Identify harmful content in the documentation. For each category, you can do the following:
- Set the mode:
- Annotate - allows the assistant to process and respond to messages. However, in the analytics, you can see the filter that the message triggered.
- Annotate and block - prevents the assistant from processing and responding to messages. In the analytics, you can see the filter that the message triggered.
- Set the severity level.
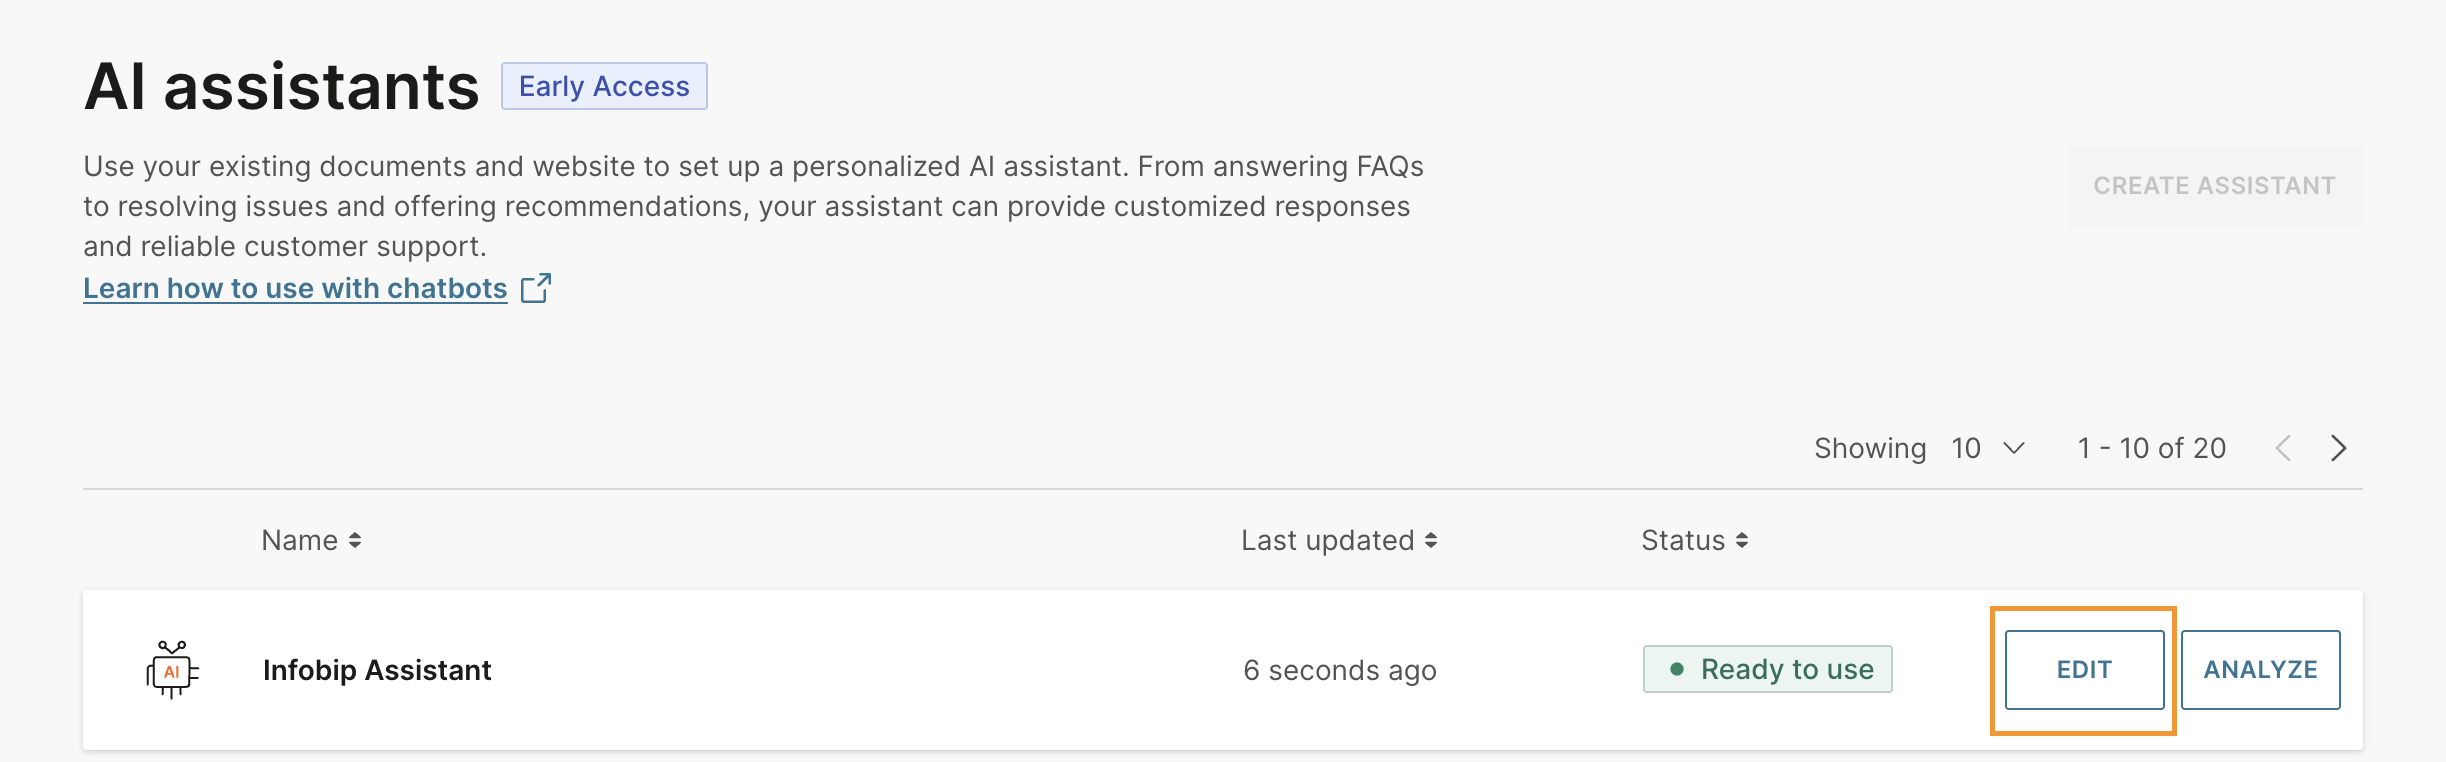
Edit the assistant
Edit the settings
You can update the configuration of the AI assistant at any time, even after you activate your chatbot.
-
On the Infobip web interface (opens in a new tab), go to AI Hub > AI assistant.
-
Select Edit.
-
In the Assistant settings, Custom content, and Content filter tabs, update the configuration.
-
Select Update assistant.
Edit training documentation
To add new or updated documentation, upload the complete documentation and not only the changes.